
Jasmin
Galette des Rois Recipe
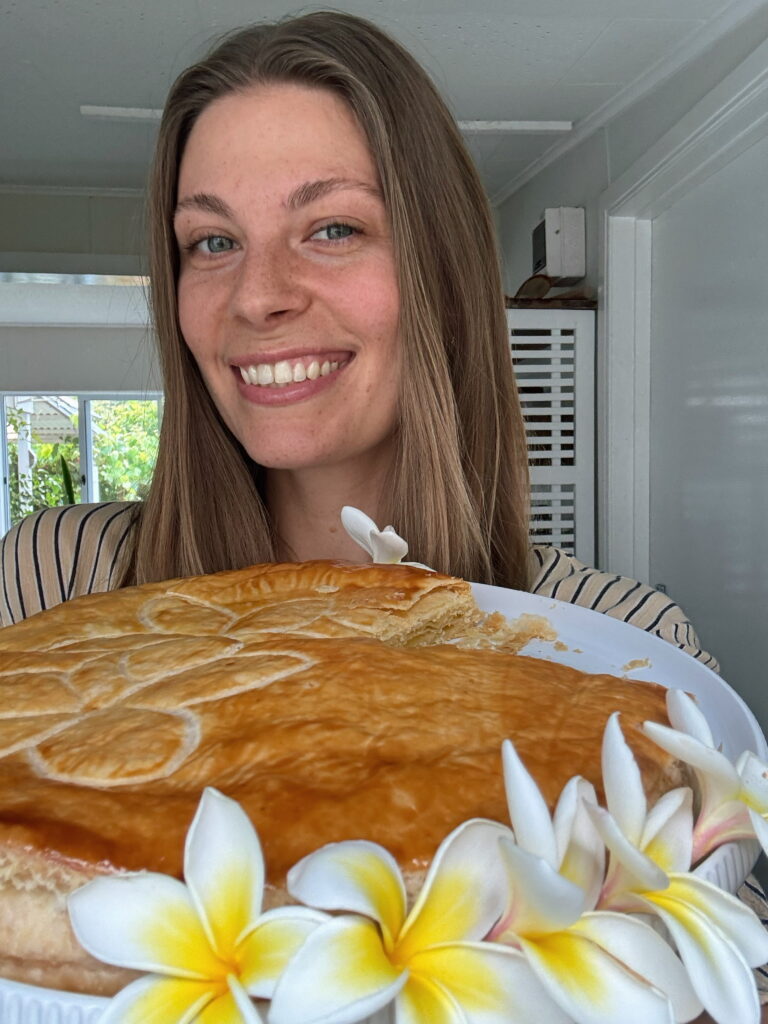
Welcome to Week 6: The Cake I Made
Galette des rois is one of France’s most iconic seasonal desserts.
Galettes des Rois are traditionally eaten in early January to celebrate Epiphany. It’s a round puff pastry cake filled with frangipane — a luxurious almond cream — and baked until golden and flaky. And it’s incredibly fragrant.
Hidden inside the galette is usually a fève, a small porcelain figurine. Whoever finds it in their slice becomes king or queen for the day and gets to wear a paper crown. It’s a ritual that brings people together around the table. For many, it’s part dessert, part game and part childhood memory.
While the tradition is centuries old, every family — and every pâtisserie — has its own version.
This year, I was gifted a surfing Santa ornament for Christmas. Can you tell I live in Australia?!
It was funny… but far too big to hide inside a galette. So instead, I slipped a Brazil nut into the frangipane. Different, but it’s still true to the spirit of the cake.
While this galette is rooted in French tradition, I decided to gently adapt it to the place I now call home.
Why this cake means so much to me
Galette des rois has always struck me as a surprisingly beautiful pastry.
I love its contrast. It’s got the golden puff pastry which gives it a rustic look. And a delicate carving on top — usually a flower or sunburst — so precise and symmetrical that it instantly makes the cake feel elevated and special.
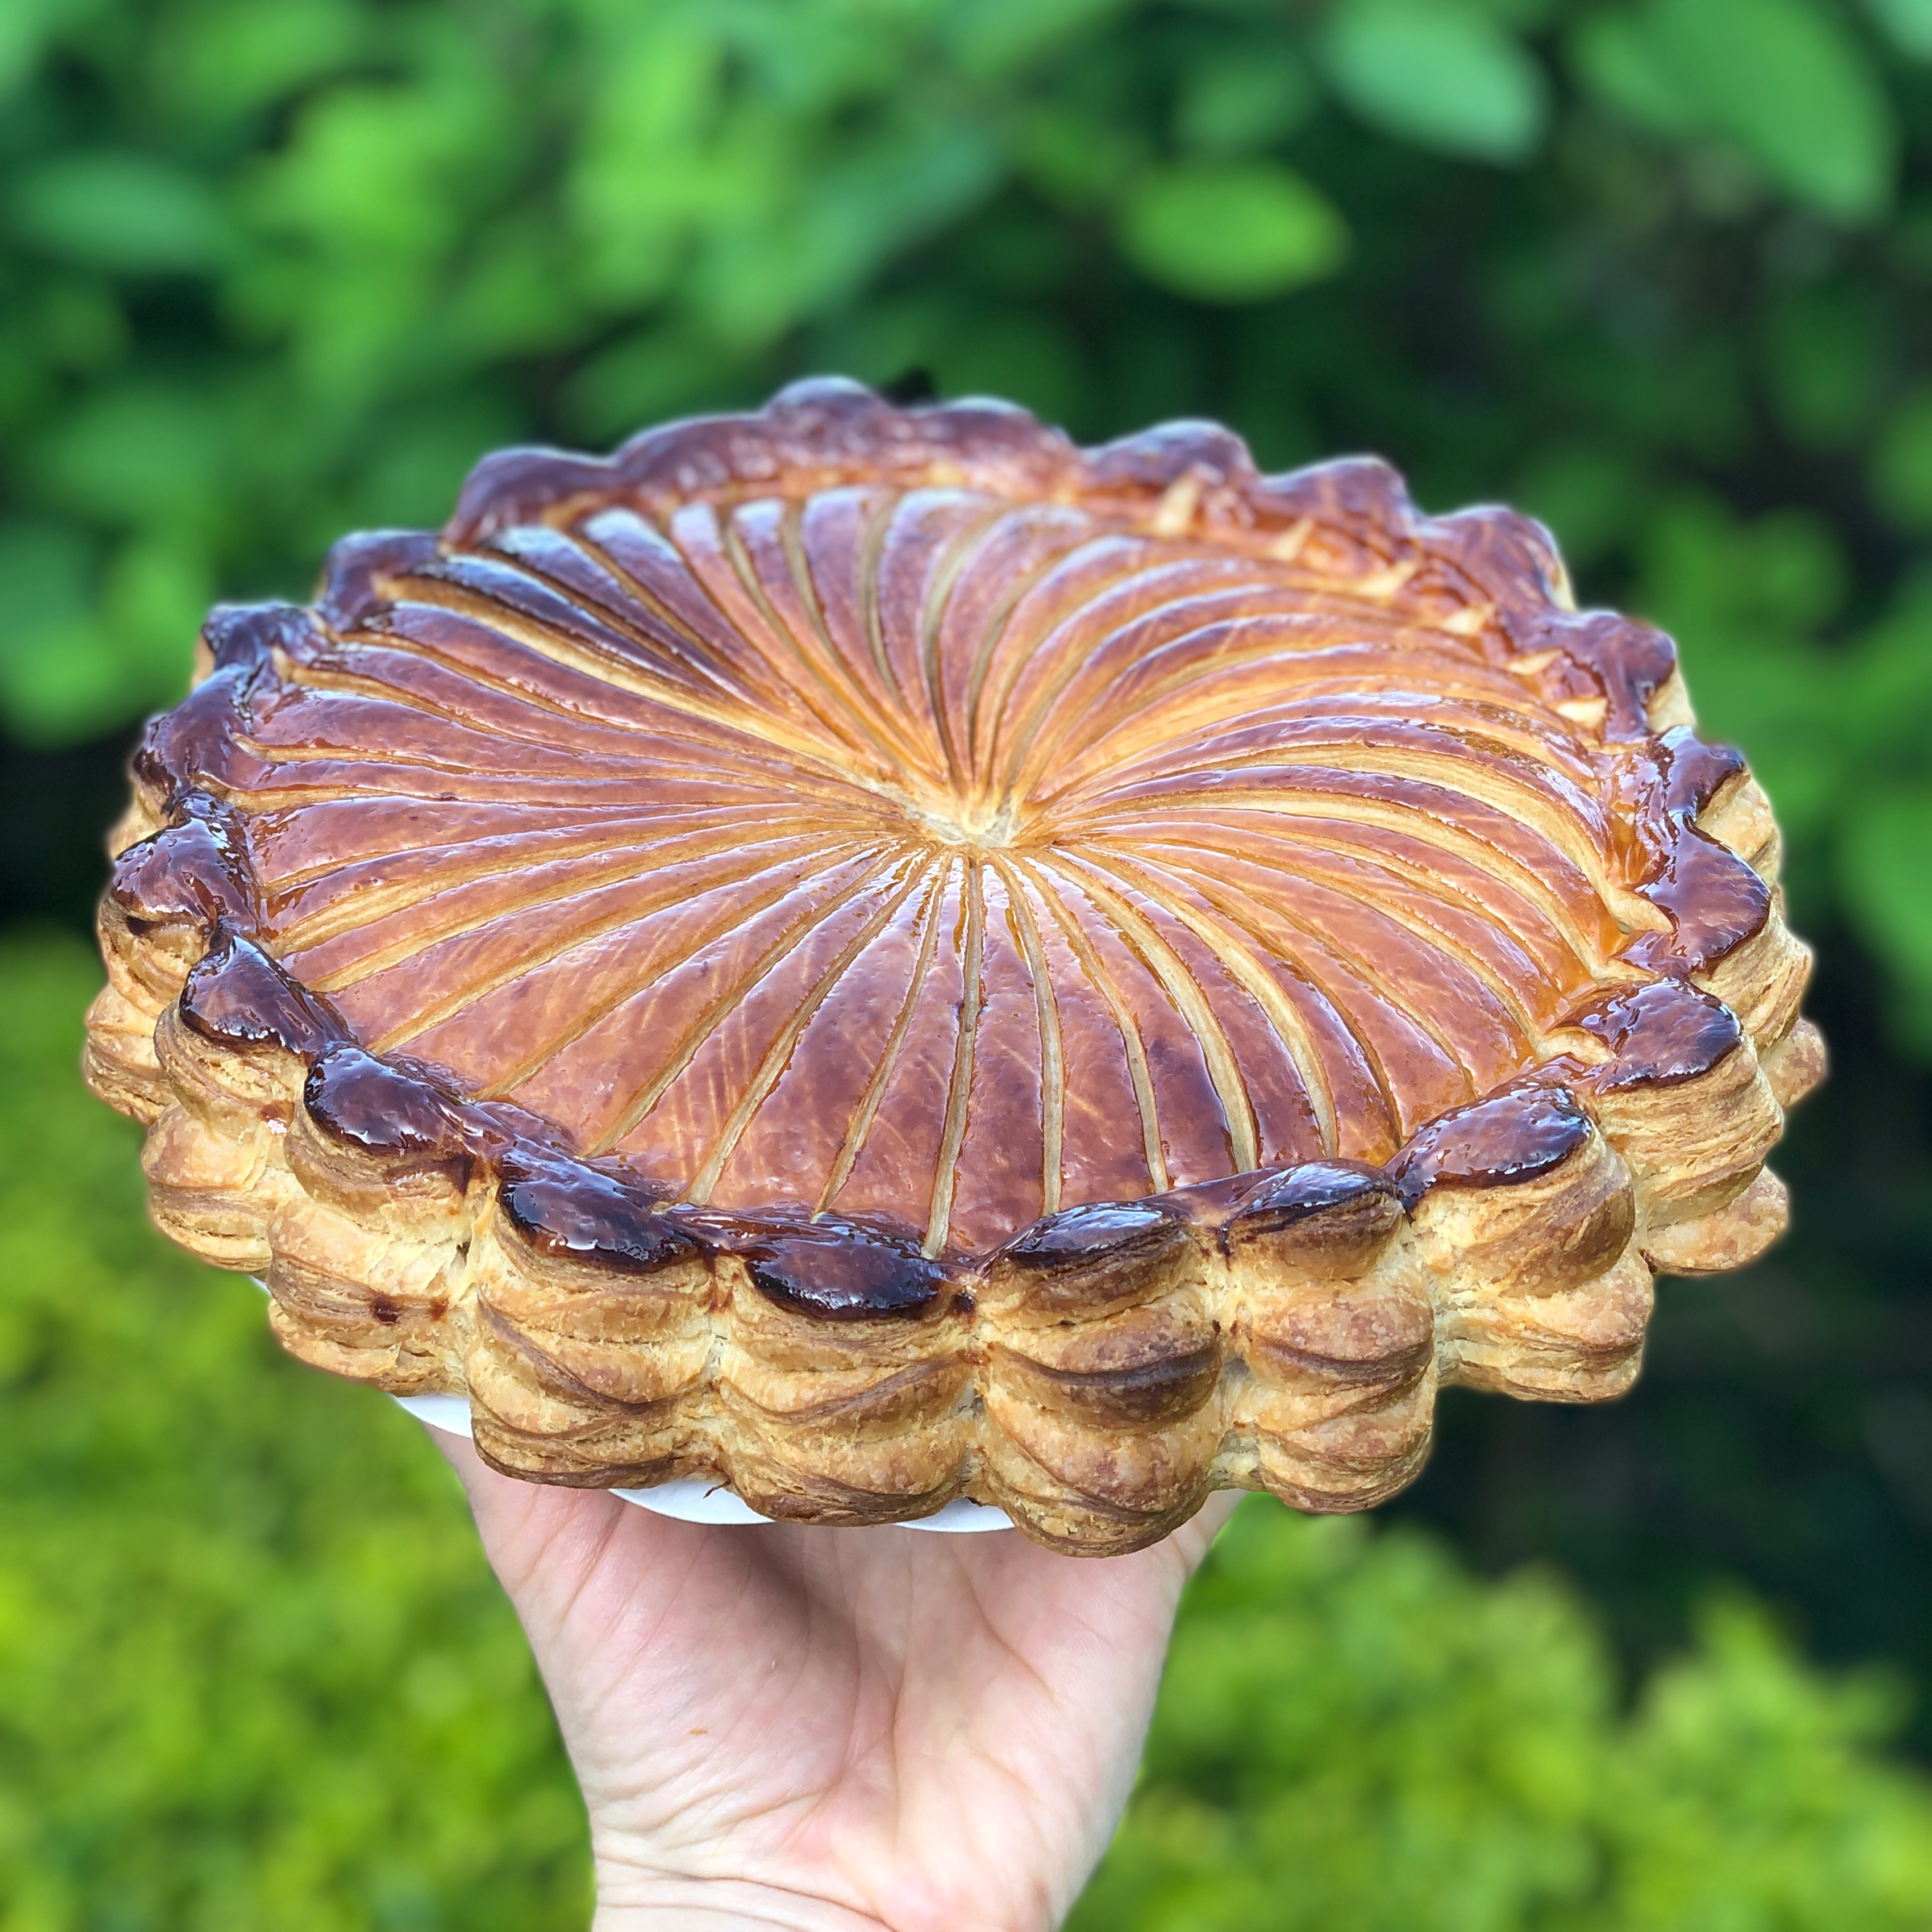
I only made it once before, back when I was doing my pâtisserie apprenticeship in France. I remember how nervous we all were about that final carving step. One wrong line or an uneven curve and you instantly get a little sad.
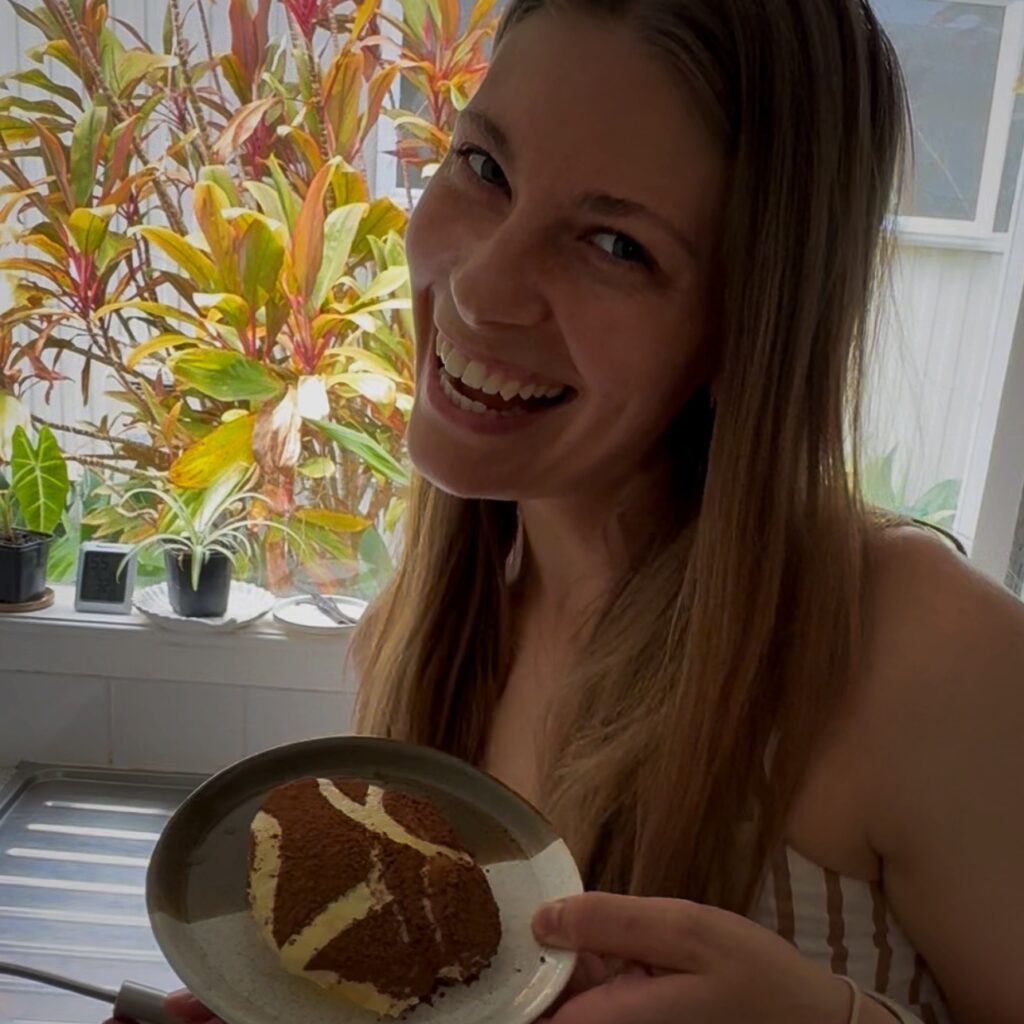
I’ve added a photo of that first galette below — I love all the memories I have attached to that beautiful time of my life.
This year, I wanted the cake to reflect where I am now.
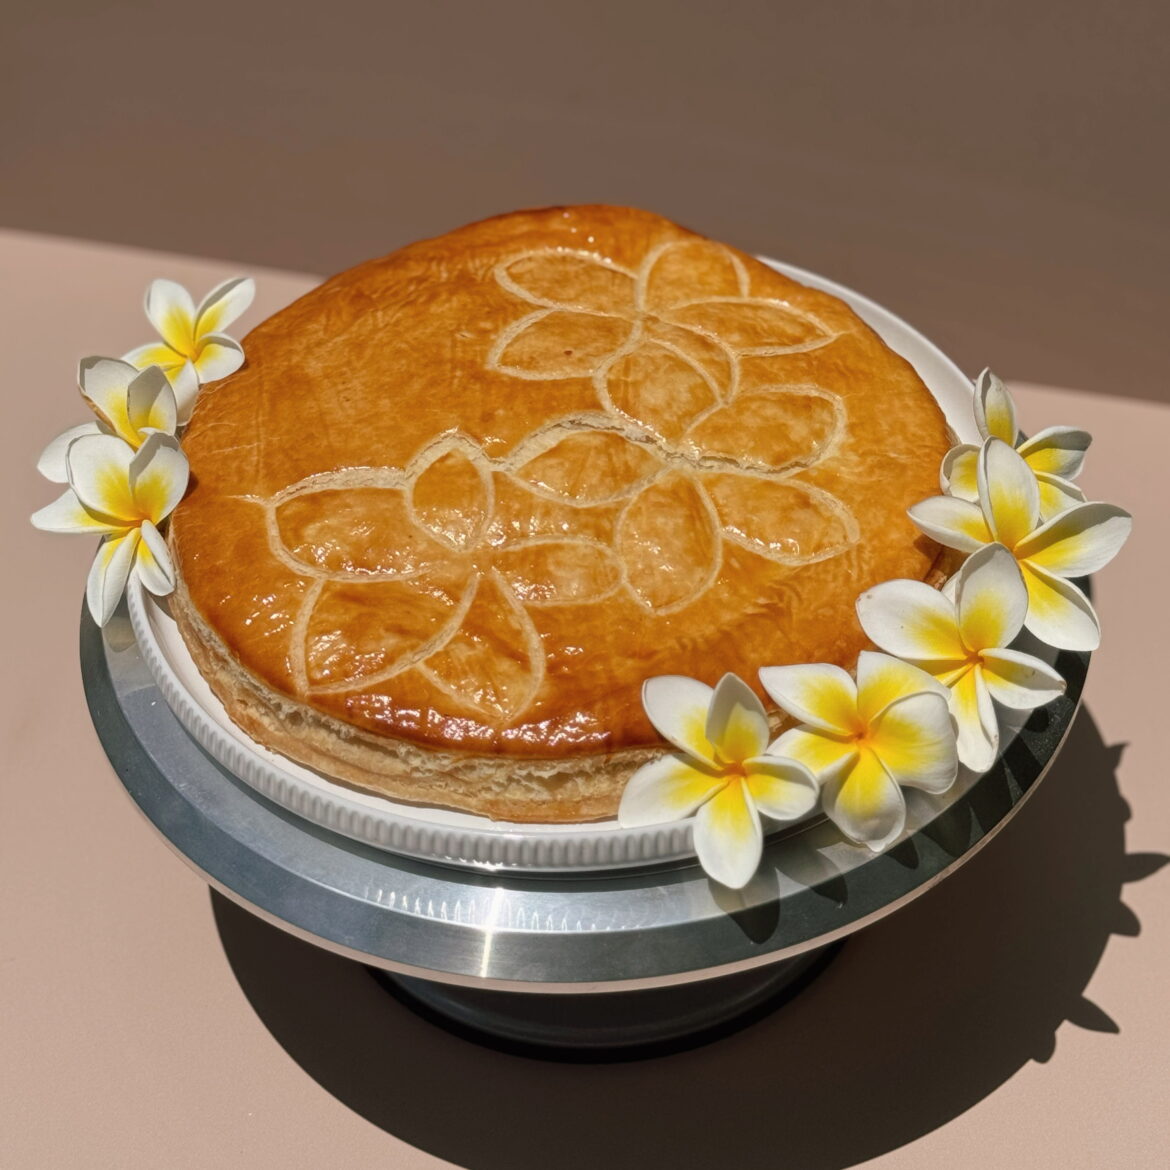
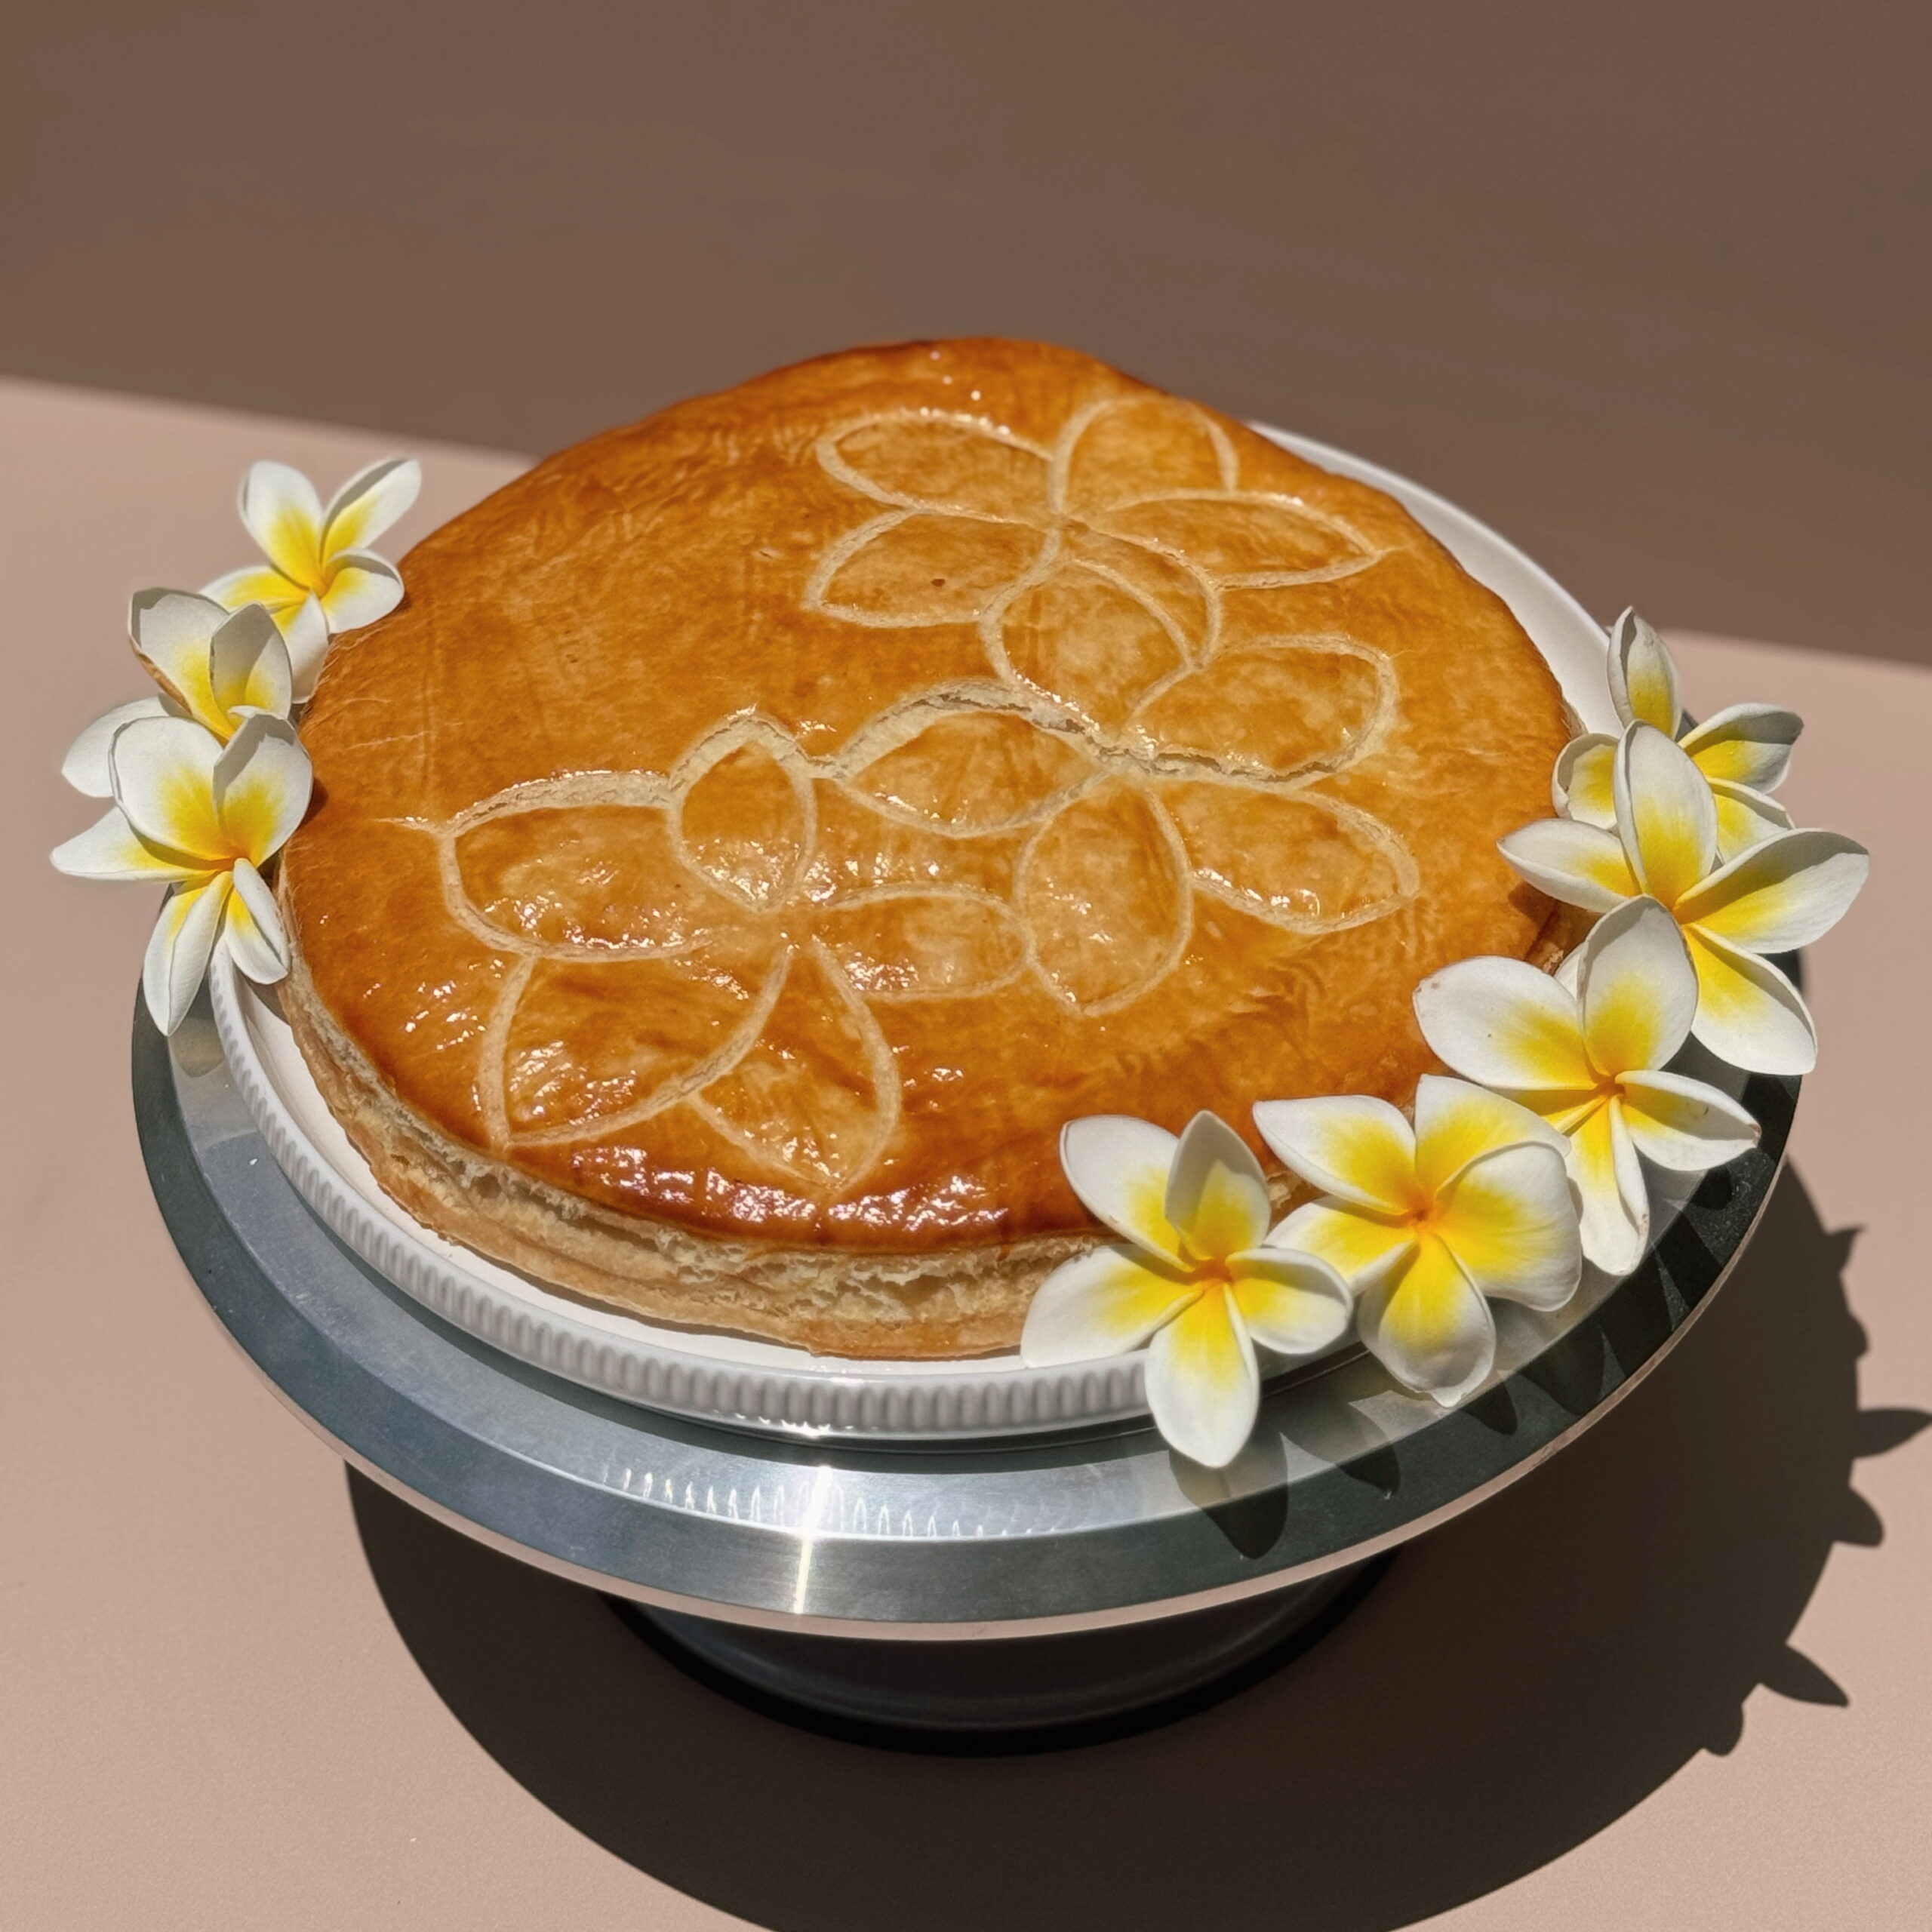
Instead of the classic single flower, I imagined something more island-inspired. I first thought of a hibiscus, surrounded by waves. And then the idea clicked: frangipani.
Not only are frangipani everywhere here, but the filling inside a galette is called frangipane — almond cream mixed with pastry cream. Suddenly, the design and the flavour just made sense.
Of course, the traditional galette carving is highly symmetrical. My idea of several flowers made things more complicated. So I drew frangipani shapes on parchment paper, laid them over the pastry, and gently carved around them. With the help of a turntable and a steady hand, it finally came together.
It’s different, but I quite like it.
And because I’m curious, please tell me — which do you prefer?
The island version, or the classic French pattern?


My tips for a perfect Galette des Rois
Getting the Frangipane right
Use finely ground almond flour for a smooth texture
Make sure your butter is soft so it creams properly
Don’t overmix once the pastry cream is added — you want it silky, not dense
Designing and carving the top
Lightly score the pastry without cutting through it
If you’re doing a more complex design (like flowers), use parchment paper as a guide
A turntable makes carving smoother and more controlled
Let it rest properly
I used pâte feuilletée inversée (inverted puff pastry), where the butter is on the outside and the dough is wrapped inside. This creates exceptionally crisp, delicate layers — and in Pâtisseries often chosen for a galette des rois.
But you can also use classic homemade puff pastry or, to keep things simple, store-bough puff pastry.
Make the Galette des Rois your own
Yes, even a pastry like this one can be personalised!
Try both classic and inverted puff pastry to see the difference
Swap almonds for hazelnuts, pistachios, or pecans if you prefer
Add citrus zest, rum, or vanilla to your frangipane
And remember — the top is a blank canvas. Flowers, waves, geometric patterns… anything can go there
Have fun baking and if any questions arise, simply shoot me me a message. I’m happy to help!
Galette des Rois
- Author: Jasmin
- Total Time: 47 minutes
- Yield: One 22–24 cm galette, serving 6 to 8 people. 1x
- Diet: Vegetarian
Description
A classic French galette des rois filled with silky almond frangipane and wrapped flaky inverted puff pastry. This version is finished with delicately carved frangipani flowers, inspired by my island life. Elegant yet rustic, it’s a cake meant to be shared, sliced, and slowly enjoyed.
Ingredients
- 230g flour
- 6g salt
- 40g butter
- 100g water
- 2g white vinegar
- 200g butter
- 50g all purpose flour
- 50g bread flour
- 70g milk
- 8g egg yolks
- 14g sugar
- 5g corn flour
- 70g butter
- 70g almond flour
- 40g sugar
- 70g egg
- 50g egg yolks
- 10g milk
- 60g sugar
- 40g water
Instructions
For the dough
1. Dissolve the salt and the vinegar in the water.
2. Add the flour and the soft butter and mix until just combined. It’s fine if it looks rough and undone. Then you’re doing it right.
3. Roll out into a 16×28 cm rectangle and put in the fridge.
For the butter block
1. Mix the butter with the flour until homogenous.
2. Roll out to a 16×56 cm rectangle and refrigerate.
To make the inverted puff pastry
1. Place the butter-flour block onto a lightly floured surface.
2. Place the dough on top and cover it with the butter block.
3. Roll out, do a double fold, followed by a single fold.
4. Let the dough rest in the fridge for one hour.
5. Do another double fold, followed by a single fold.
6. Leave in the fridge for 12 hours.
For the Frangipane cream
1. Make the pastry cream first.
2. For that, heat the milk.
3. In the meantime, combine egg yolks and sugar until pale. Add the flour and stir.
4. Pour some of the hot milk over the egg mix and stir.
5. Put everything into the pot with the remaining milk and gently heat up. The cream will thicken quickly, make sure to stir throughout.
6. Once cooked, transfer to cling wrap and keep in the fridge.
7. For the almond cream, combine soft butter and sugar.
8. Adding a bit at the time, incorporate the egg.
9. Finish by gently folding in the almond flour.
10. Combine both pastry cream and almond cream to make frangipane cream.
11. For that, give the cooled pastry cream a good stir: it should be come supple and glossy.
12. In three steps, fold in the almond cream.
13. Use immediately.
To assemble
1. Roll the dough out to a 27x54cm block. Cut in half to get two 27x27cm squares.
Refrigerate or put in the freezer in between whenever the dough starts to pull back.
2. Fill the frangipane cream in a piping bag with a 10mm nozzle (or similar size).
3. Pipe a 18cm spiral on top of one dough square. Place a figurine or nut somewhere.
4. With a brush, apply some water on the outside of the spiral.
5. Place the second square on top. Lightly press around the cream so that both doughs stick together.
6. Then, place a 22-24cm ring on top. Centre well. Depending on the ring, either press down to cut through the dough or use a knife to cut around it.
7. Refrigerate for at least an hour.
To carve and bake
1. Mix the egg yolk and milk for the egg wash.
2. Take the galette out of the fridge, turn it onto the other side and apply egg wash twice.
3. Carve your desired pattern on top. See tips above to see how I did it.
4. Make a couple of holes so that air can leave the galette while baking.
4. Put back in the fridge while the oven preheats to 170°C.
5. Bake for 40-45 minutes until golden.
Notes
This galette des rois is made with frangipane and inverted puff pastry for an extra crisp, delicate finish. A traditional porcelain fève is usually hidden inside, but you can substitute a nut if you prefer. Let the assembled galette rest well in the fridge before baking to help preserve the shape and the carving.
- Prep Time: 2
- Cook Time: 45
- Category: Dessert
- Method: Baking
- Cuisine: French
Get ready for 2026: Creamy Drawer Tiramisu
Welcome to Week 5: The Cake I Made
Tiramisu drawers have been around for a while now. Or at least on social media they have. And every time I see one, I get that same tiny thrill: a drawer opening, the expectation of forks or napkins… and then suddenly, nothing but tiramisu.
How cool is that?
Is it necessary? Probably not. Is it practical? Also debatable.
But let me tell you this: opening my own kitchen drawer and finding a silky, cocoa-topped tiramisu inside it was so much fun. And honestly, it was worth it.
This Creamy Drawer Tiramisu is made for moments like New Year’s Eve, Friendsmas or any potluck where you get to host.
It’s the kind of dessert that invites people to gather around, peek inside and scoop straight from the tray.
And unlike my Bûche de Noël recipe, this one is refreshingly easy to make while still feeling special.
Why this cake means so much to me
I love tiramisu. And I especially love a homemade version. I’ll admit I’m a bit picky when it comes to how much coffee or alcohol is in it, and there is something deeply satisfying about being in control of both.
I generally prefer desserts without alcohol, so I made this one alcohol-free, though you can absolutely add some if you like. You’ll find the quantities in the recipe below.
When it comes to coffee, I like to decide exactly how intense it is. You can dip the savoiardi for as long as you wish, just keep in mind that they become very soft very quickly. A few seconds makes all the difference between creamy layers and biscuits that completely fall apart.
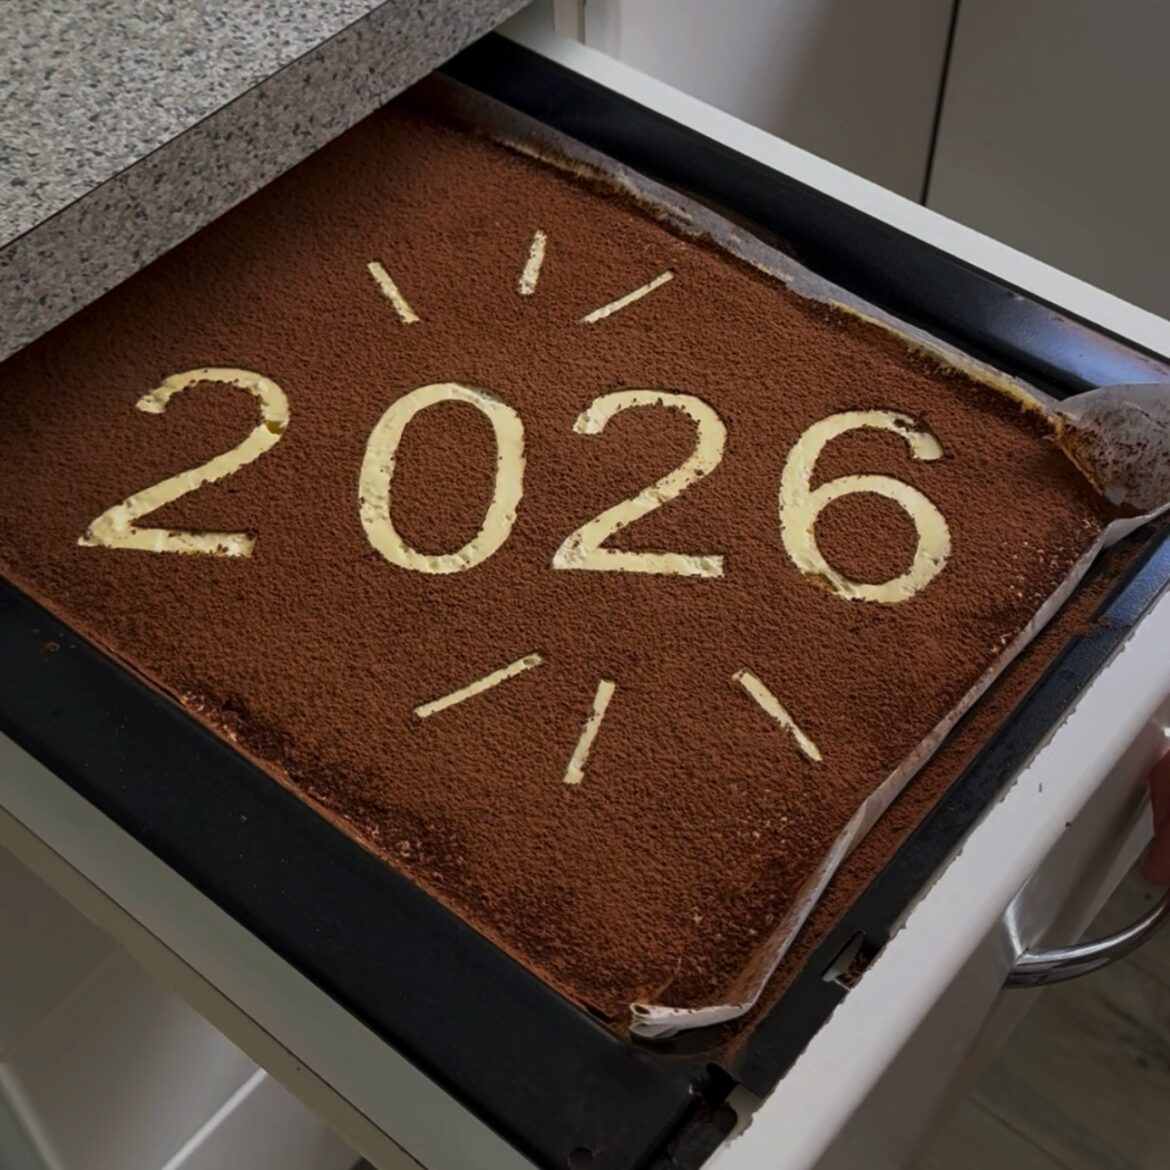
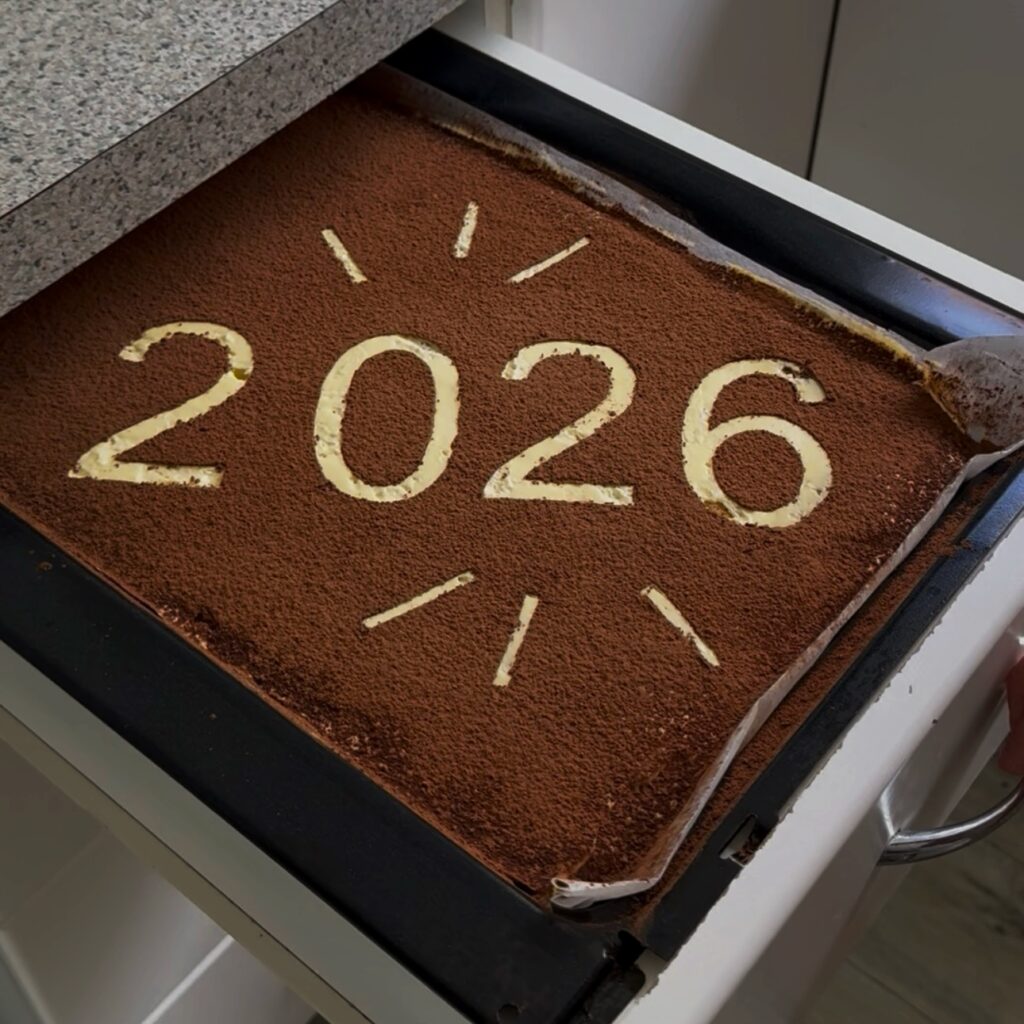
The most fun and slightly terrifying part of this tiramisu was adding the 2026 numbers on top before dusting it with cocoa. Would it work? Would I be able to lift them off without ruining the surface?
I was so relieved when it worked out, because I absolutely love the look of it. You’ll find my 2026 template below, but you can print and cut out anything you like. A name, a date, a little message. It turns a simple tiramisu into something that feels personal and celebratory.
My tips for a perfect Tiramisu
Take your time with the egg yolks
Beat the egg yolks and sugar until the mixture is pale, thick and fluffy.
- You can’t really overbeat here, but you can definitely underbeat, so give it time.
This step creates the signature velvety texture that makes tiramisu feel luxurious.
Be gentle with the savoiardi
- Dip them quickly rather than letting them soak.
- A brief dip keeps them soft but still structured.
- Over-soaked biscuits are the number one reason tiramisu turns watery and collapses.
Let it rest properly
- Chill the tiramisu for at least six hours, ideally overnight.
- This allows the layers to settle and the flavours to meld.
- A well-rested tiramisu scoops cleanly and tastes deeper and more balanced.
Make the Tiramisu your own
As with any cake, you can even make this Tiramisu you own! Think about experimenting with the following:
Add a message on top using a paper stencil before dusting with cocoa
Use a date, a name or a short phrase like Happy Birthday or Congratulations
Try a different flavour direction like chocolate, berry or citrus-infused tiramisu
Add a splash of Marsala, rum or coffee liqueur if you enjoy a boozy version
This recipe is for a traditional tiramisu, which is my personal favourite. But these days, almost any flavour can be turned into a tiramisu. If you feel like experimenting, you can find a great collection of creative variations here.
Enjoy and as always, feel free to reach out in case you have any questions.
Tiramisu Drawer
- Author: Jasmin
- Total Time: 30 minutes
- Yield: Serves about 10 to 12 people 1x
- Diet: Vegetarian
Ingredients
- 500 g mascarpone
- 300 ml thickened or whipping cream
- 4 large eggs, separated
- 110 g caster sugar
- 1 1/2 teaspoons vanilla extract
- A pinch of salt
- 200 to 250 g savoiardi (ladyfinger biscuits)
- 350 to 400 ml strong brewed coffee or espresso, cooled
- If you want to add alcohol: 2 to 3 tablespoons Marsala, dark rum or coffee liqueur
- Unsweetened cocoa powder for dusting
Instructions
1. Start by whisking the egg yolks with 70 g of the sugar until pale, thick and creamy.
2. Add the mascarpone and vanilla and whisk gently until smooth.
3. In a separate bowl whip the cream to soft peaks.
4. In another clean bowl whisk the egg whites with the remaining 40 g sugar and the pinch of salt until soft peaks form.
5. Fold the whipped cream into the mascarpone mixture, then gently fold in the whipped egg whites until just combined and airy.
6. Mix the cooled coffee with the alcohol if using.
7. Spread about one third of the cream evenly over the base of a 28 x 40 cm tray.
8. Quickly dip each savoiardi into the coffee for about two seconds per side and arrange them in a single tight layer over the cream.
9. Spoon the remaining cream on top and smooth it into an even layer, keeping the total height close to 5 cm.
10. Cover and refrigerate for at least 6 hours, ideally overnight.
11. Just before serving dust generously with cocoa powder.
Notes
This recipe is designed to be low profile so it fits inside a drawer or shallow fridge space without touching the lid. The whipped cream makes the filling lighter and more spreadable while still keeping the classic tiramisu flavour. For best texture and flavour it should always be chilled overnight. The cocoa should be added only just before serving so it stays dry and velvety on top.
- Prep Time: 30
- Category: Dessert
- Method: No bake
- Cuisine: Italian
Nectarine Hibiscus Bûche de Noël
Welcome to Week 4: The Cake I Made
I have come a long way since making my very first bûche de Noël for my French class at the age of 17. I really liked it at the time (I even made chocolate petals!) and when looking back now I am so happy young Jasmin just did it.
Who knows where I’d be today if I hadn’t done all the cakes I did when I was a teenager.
You’ll find a photo of that very first bûche below. I’m glad I kept the photo as it makes me grin every time I look at it.
Since then, I have learned a lot. I didn’t just improve technically, I truly discovered my love for French pâtisserie. That love eventually led me to take a big leap and move to France, immersing myself fully in pastry school, kitchens, techniques and a completely different way of thinking about desserts.
Fast forward to today and I am living on a tiny island in the South Pacific, still making French pâtisserie. If anything, I am doing it with more intention than ever. More attention to detail, not only visually, but also to what I put into my cakes and why.
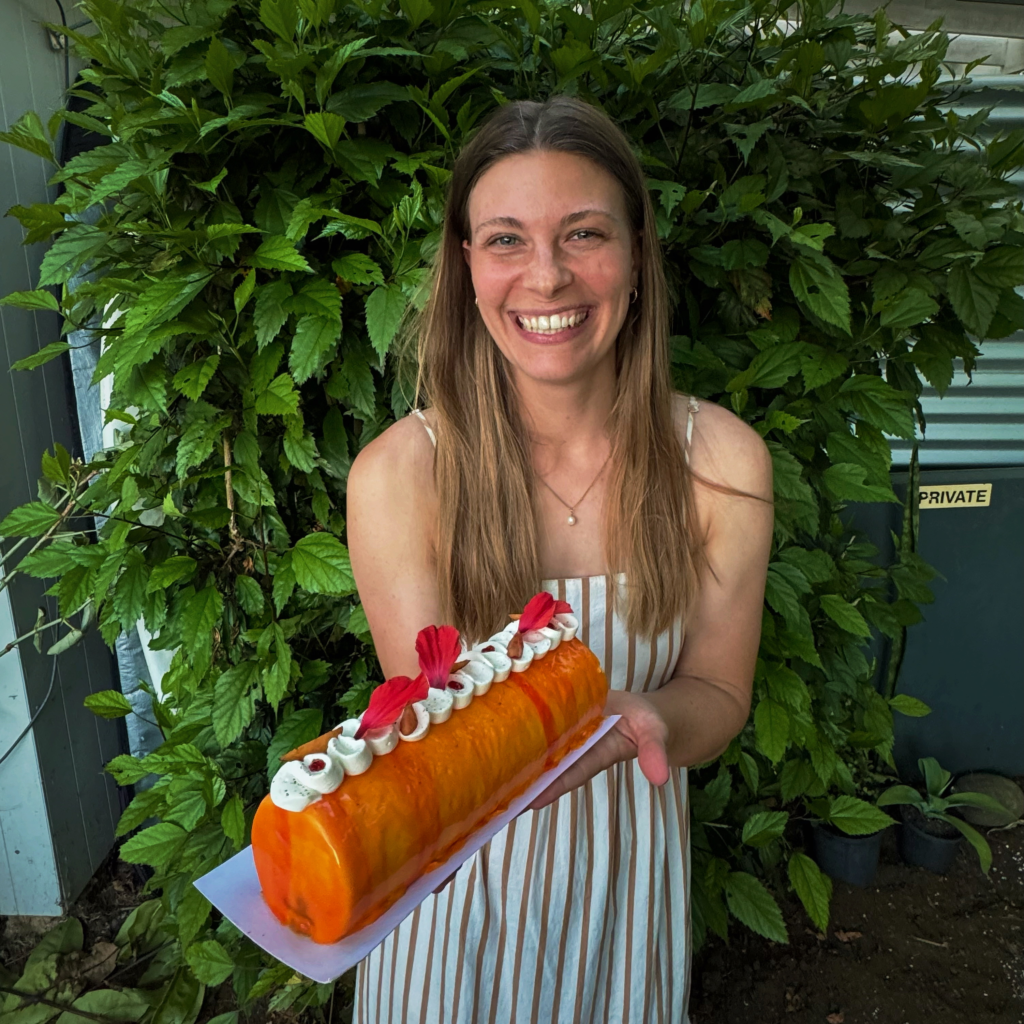
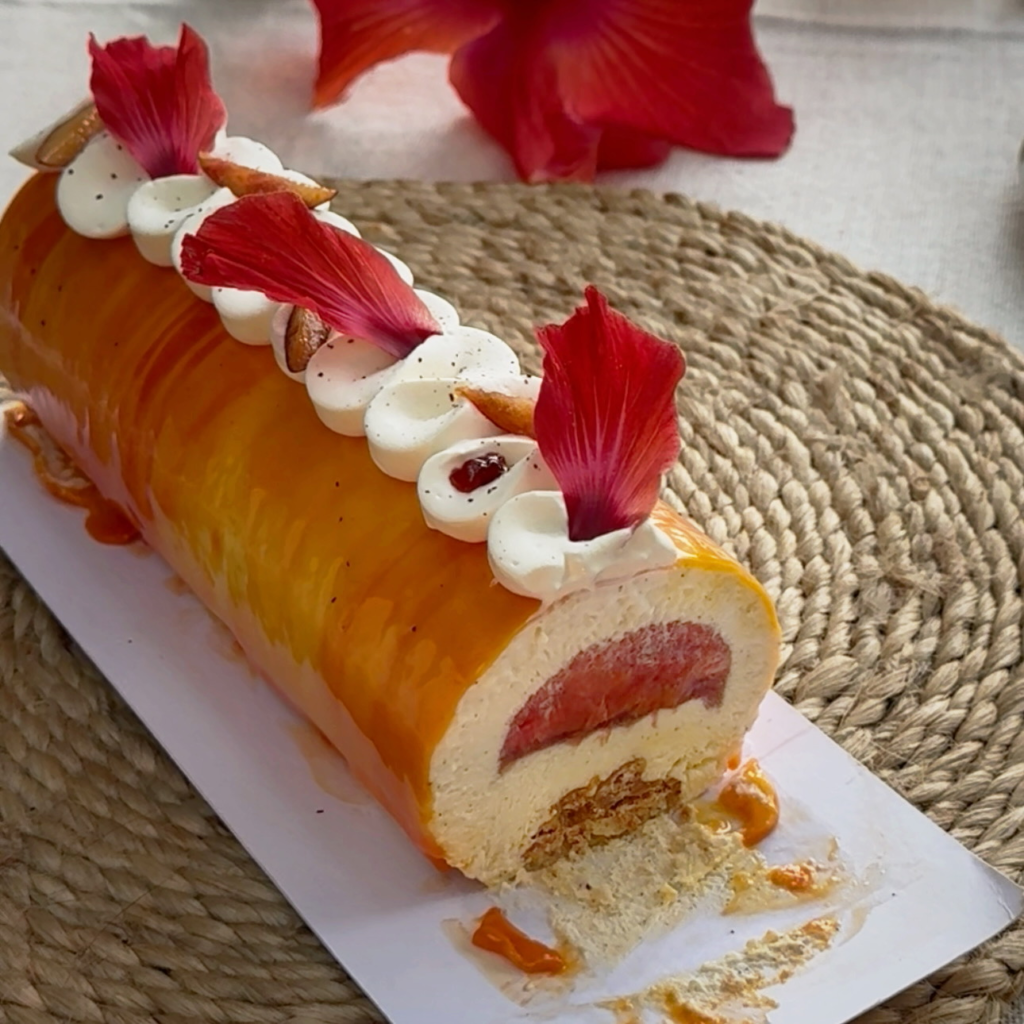
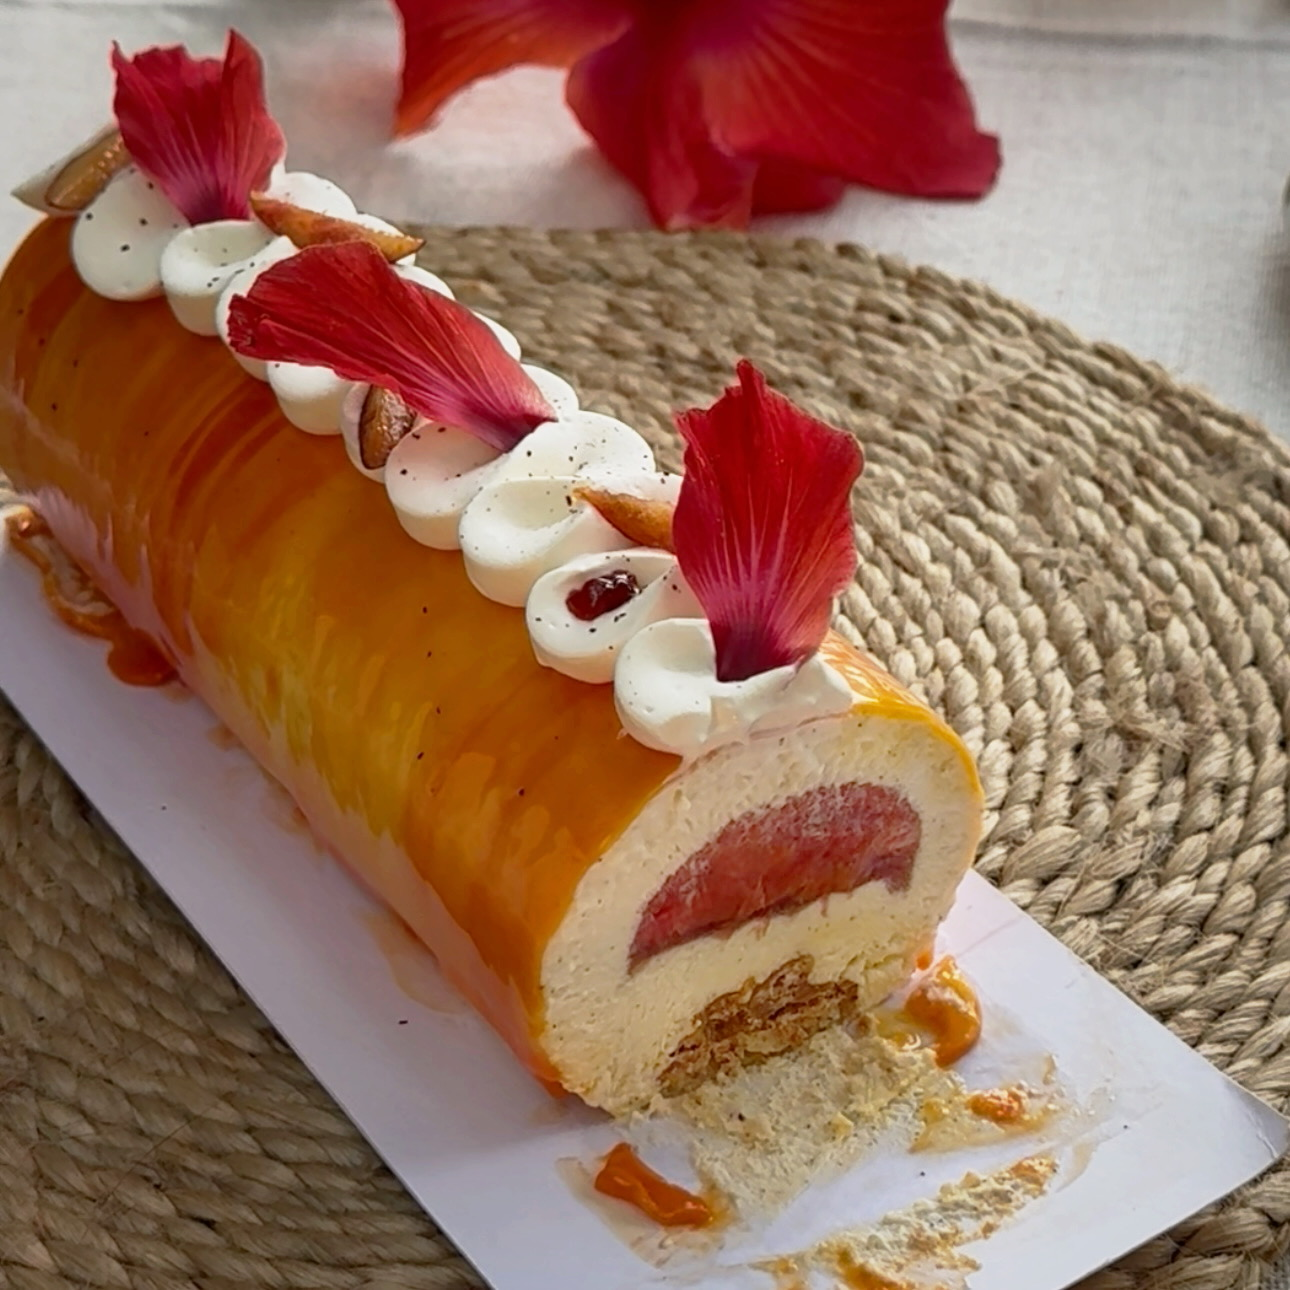
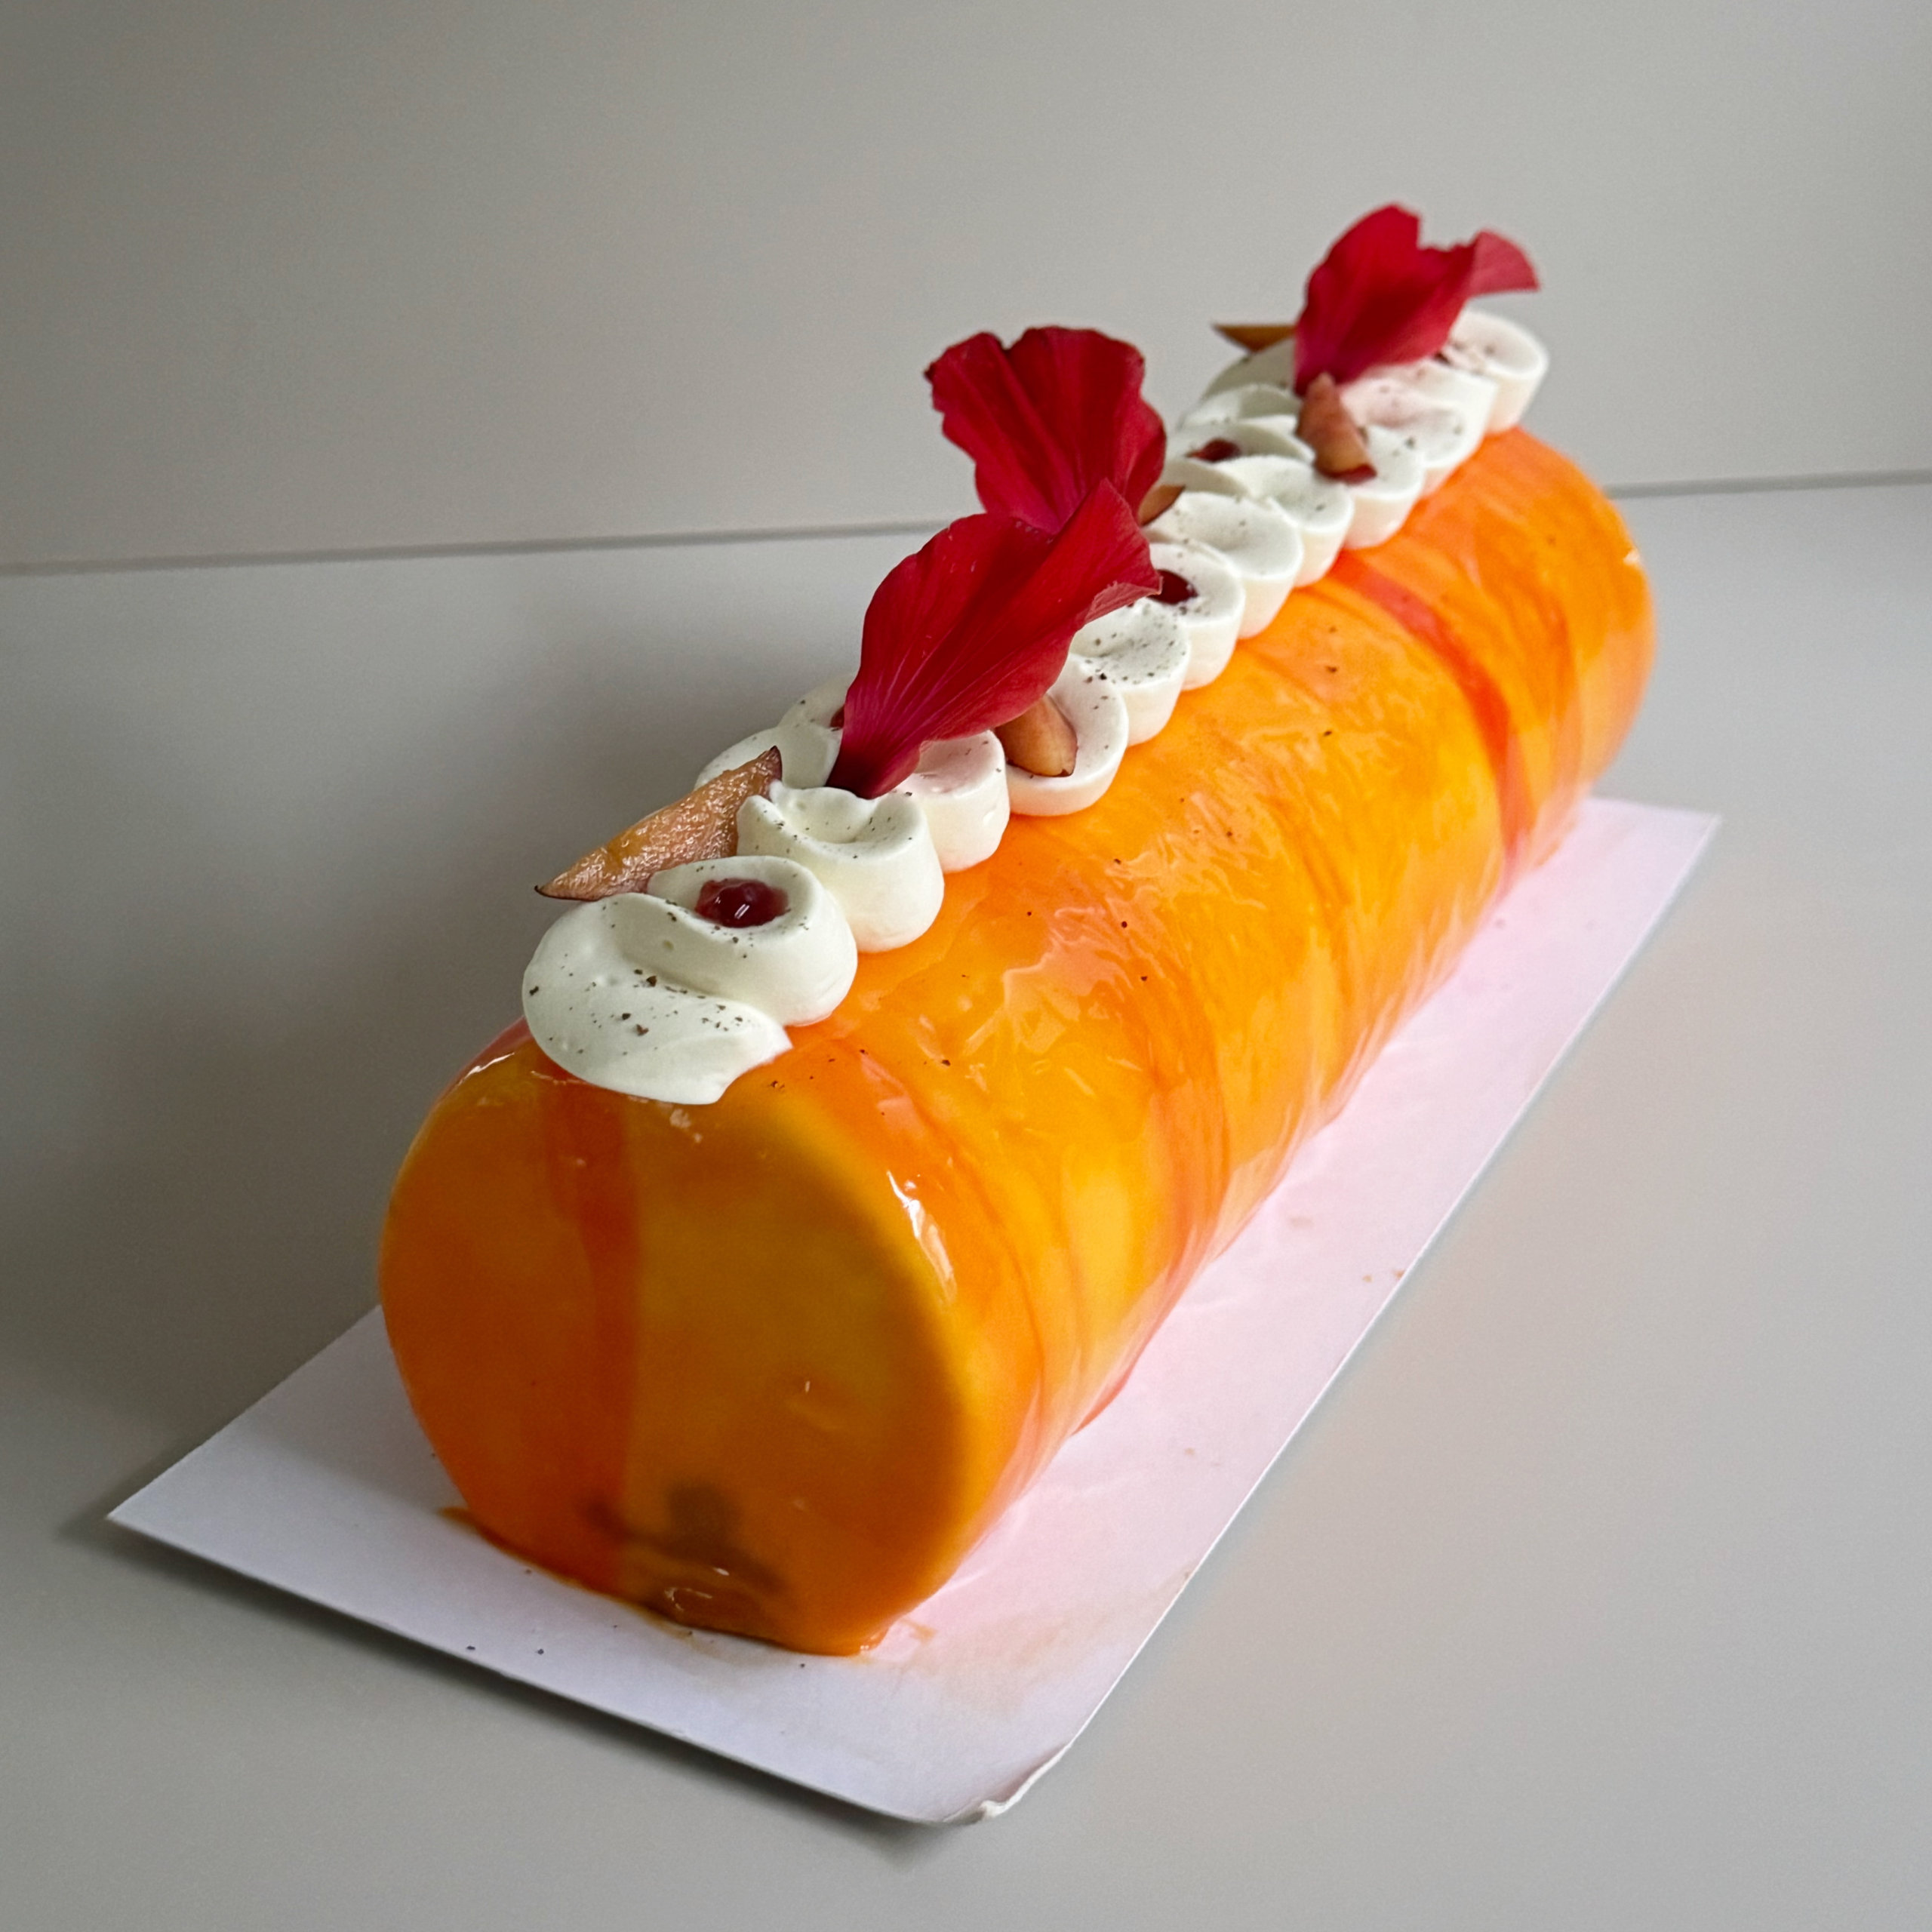
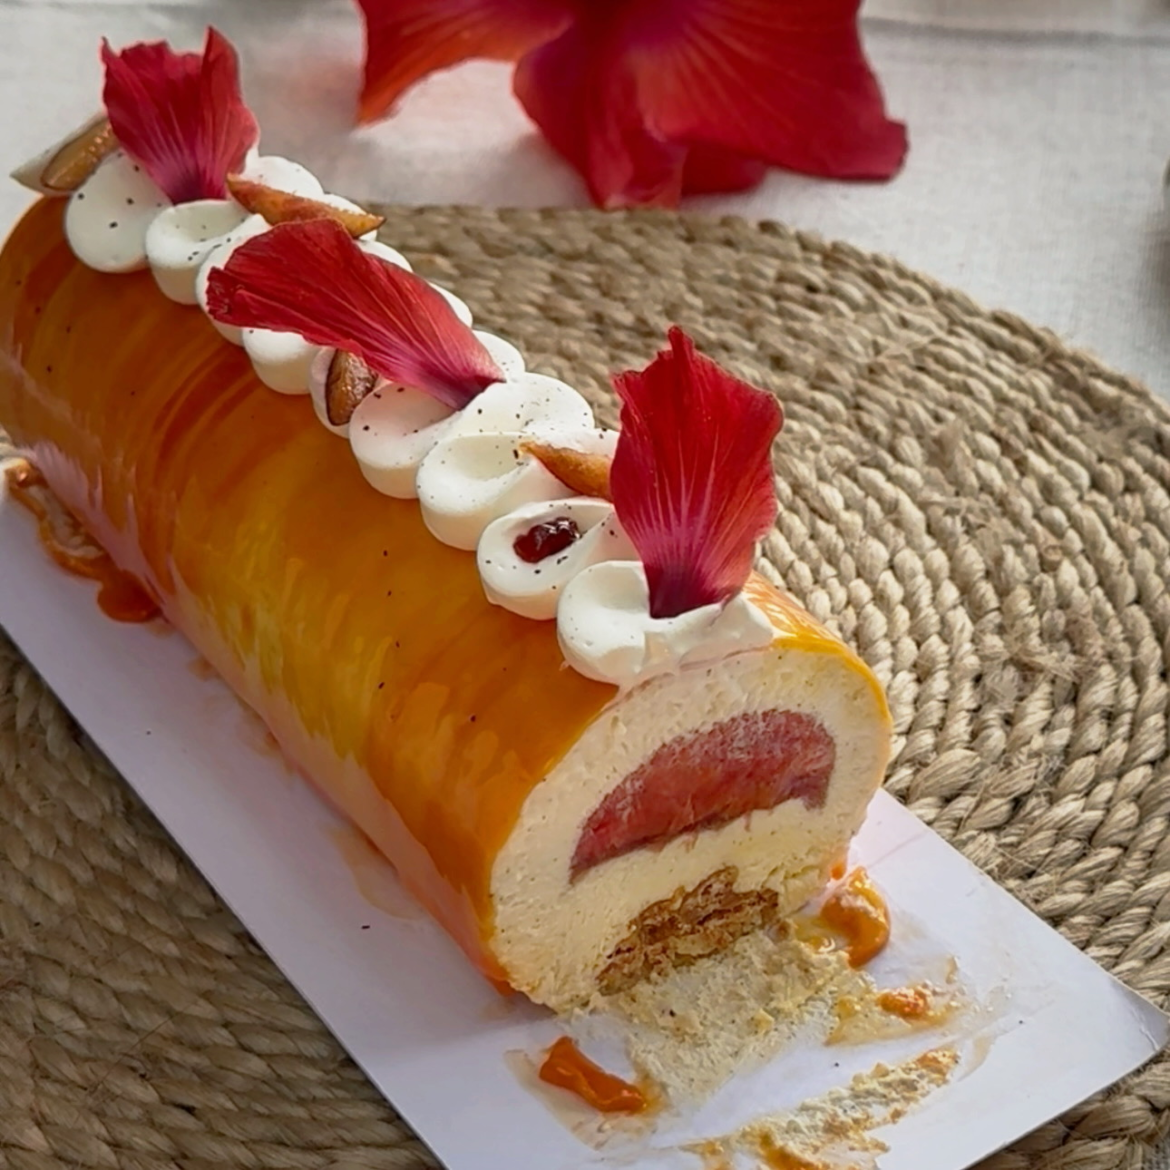
This cake is not “just another” Bûche de Noël to me. It reflects who I have become and what I value in a good dessert. It features fresh, local fruit — because it is summer on this side of the world — hibiscus flowers that I picked and dried myself, reduced sugar across almost all components, and it is entirely gluten-free. I wanted to create a cake I could share with those close to me, without needing to explain or exclude.
And this is how this Nectarine Hibiscus Bûche de Noël was born.
Why this cake means so much to me
I actually haven’t made a huge number of bûches in my life. I’ve made my fair share of entremets, but a bûche feels different. It’s tied to Christmas and tradition.
When I visited home in Germany in August this year, I knew I wanted to bring back a few silicone moulds that are either hard to get here in Australia or so overpriced that it simply doesn’t make sense.
Somewhere between browsing online and imagining future cakes, I decided it might finally be time to get myself a proper bûche mould.
So I did.
And then I realised I had forgotten the insert mould.
That moment led to a bit of improvisation. In the end, I used an empty roll of paper towels, cut it open lengthwise, secured the ends with cardboard, and lined the inside with acetate. It wasn’t elegant, but it was functional — and it worked. Luckily.
If you want to recreate this cake, I do recommend using a proper bûche insert mould if you have access to one. It makes life easier and the results more predictable. Quantity-wise, though, you should still be able to use my recipe below without changes.
In a way, that little workaround sums up this cake perfectly. It’s rooted in classic French technique, but adapted to what I have, where I am, and how I want to bake today.
My tips for a perfect Bûche
Plan the Cake backwards
- Start with everything that needs freezing first: the fruit insert, the gel layer and the joconde and crumble. These can all be made one or even two days ahead.
- On assembly day, you only want to focus on making the mousse and putting everything together calmly, without rushing or multitasking.
- Ideally, you will want to glaze and decorate the cake on the next day.
Get your Workflow right
- Prepare and freeze the insert fully before you even think about the mousse.
- Trim your joconde and prepare the crumble and croustillant layer ahead of time.
- Once the bavaroise is made, work efficiently: line the mould, fill, insert, close and freeze straight away.
A good bûche is all about good timing.
Build a light but strong Joconde
- Whip the eggs, sugar and almond flour until you reach a proper ribbon stage — pale, thick and aerated. This step gives the sponge its structure.
- Fold in the meringue gently but thoroughly, then add the dry ingredients and butter carefully.
- The finished sponge should be flexible, soft and able to support the cake without cracking.
Make the Bûche your own
Adapt it to your season
If you’re making this in winter in Europe, swap nectarine for pear, apple, quince or citrus. Poached pear with vanilla works beautifully, as do blood orange or mandarin segments paired with the hibiscus gel. The floral acidity of hibiscus complements many winter fruits surprisingly well.
Change the nut profile
Almond can easily be replaced with hazelnut or pistachio in the joconde and crumble.
Decorate to match your style
A mirror glaze gives a sleek, modern finish, while a velvet spray feels more traditional and festive. For a summer version, keep it minimal and add fresh fruit, dried hibiscus petals or herbs. Even a simple line of whipped ganache on top can completely change the look.
Have fun and feel free to reach out if you have any questions!


Nectarine-Hibiscus Bûche de Noel
- Author: Jasmin
- Total Time: 0 hours
- Yield: 1 bûche, approximately 1000 ml total volume 1x
- Diet: Gluten Free
Description
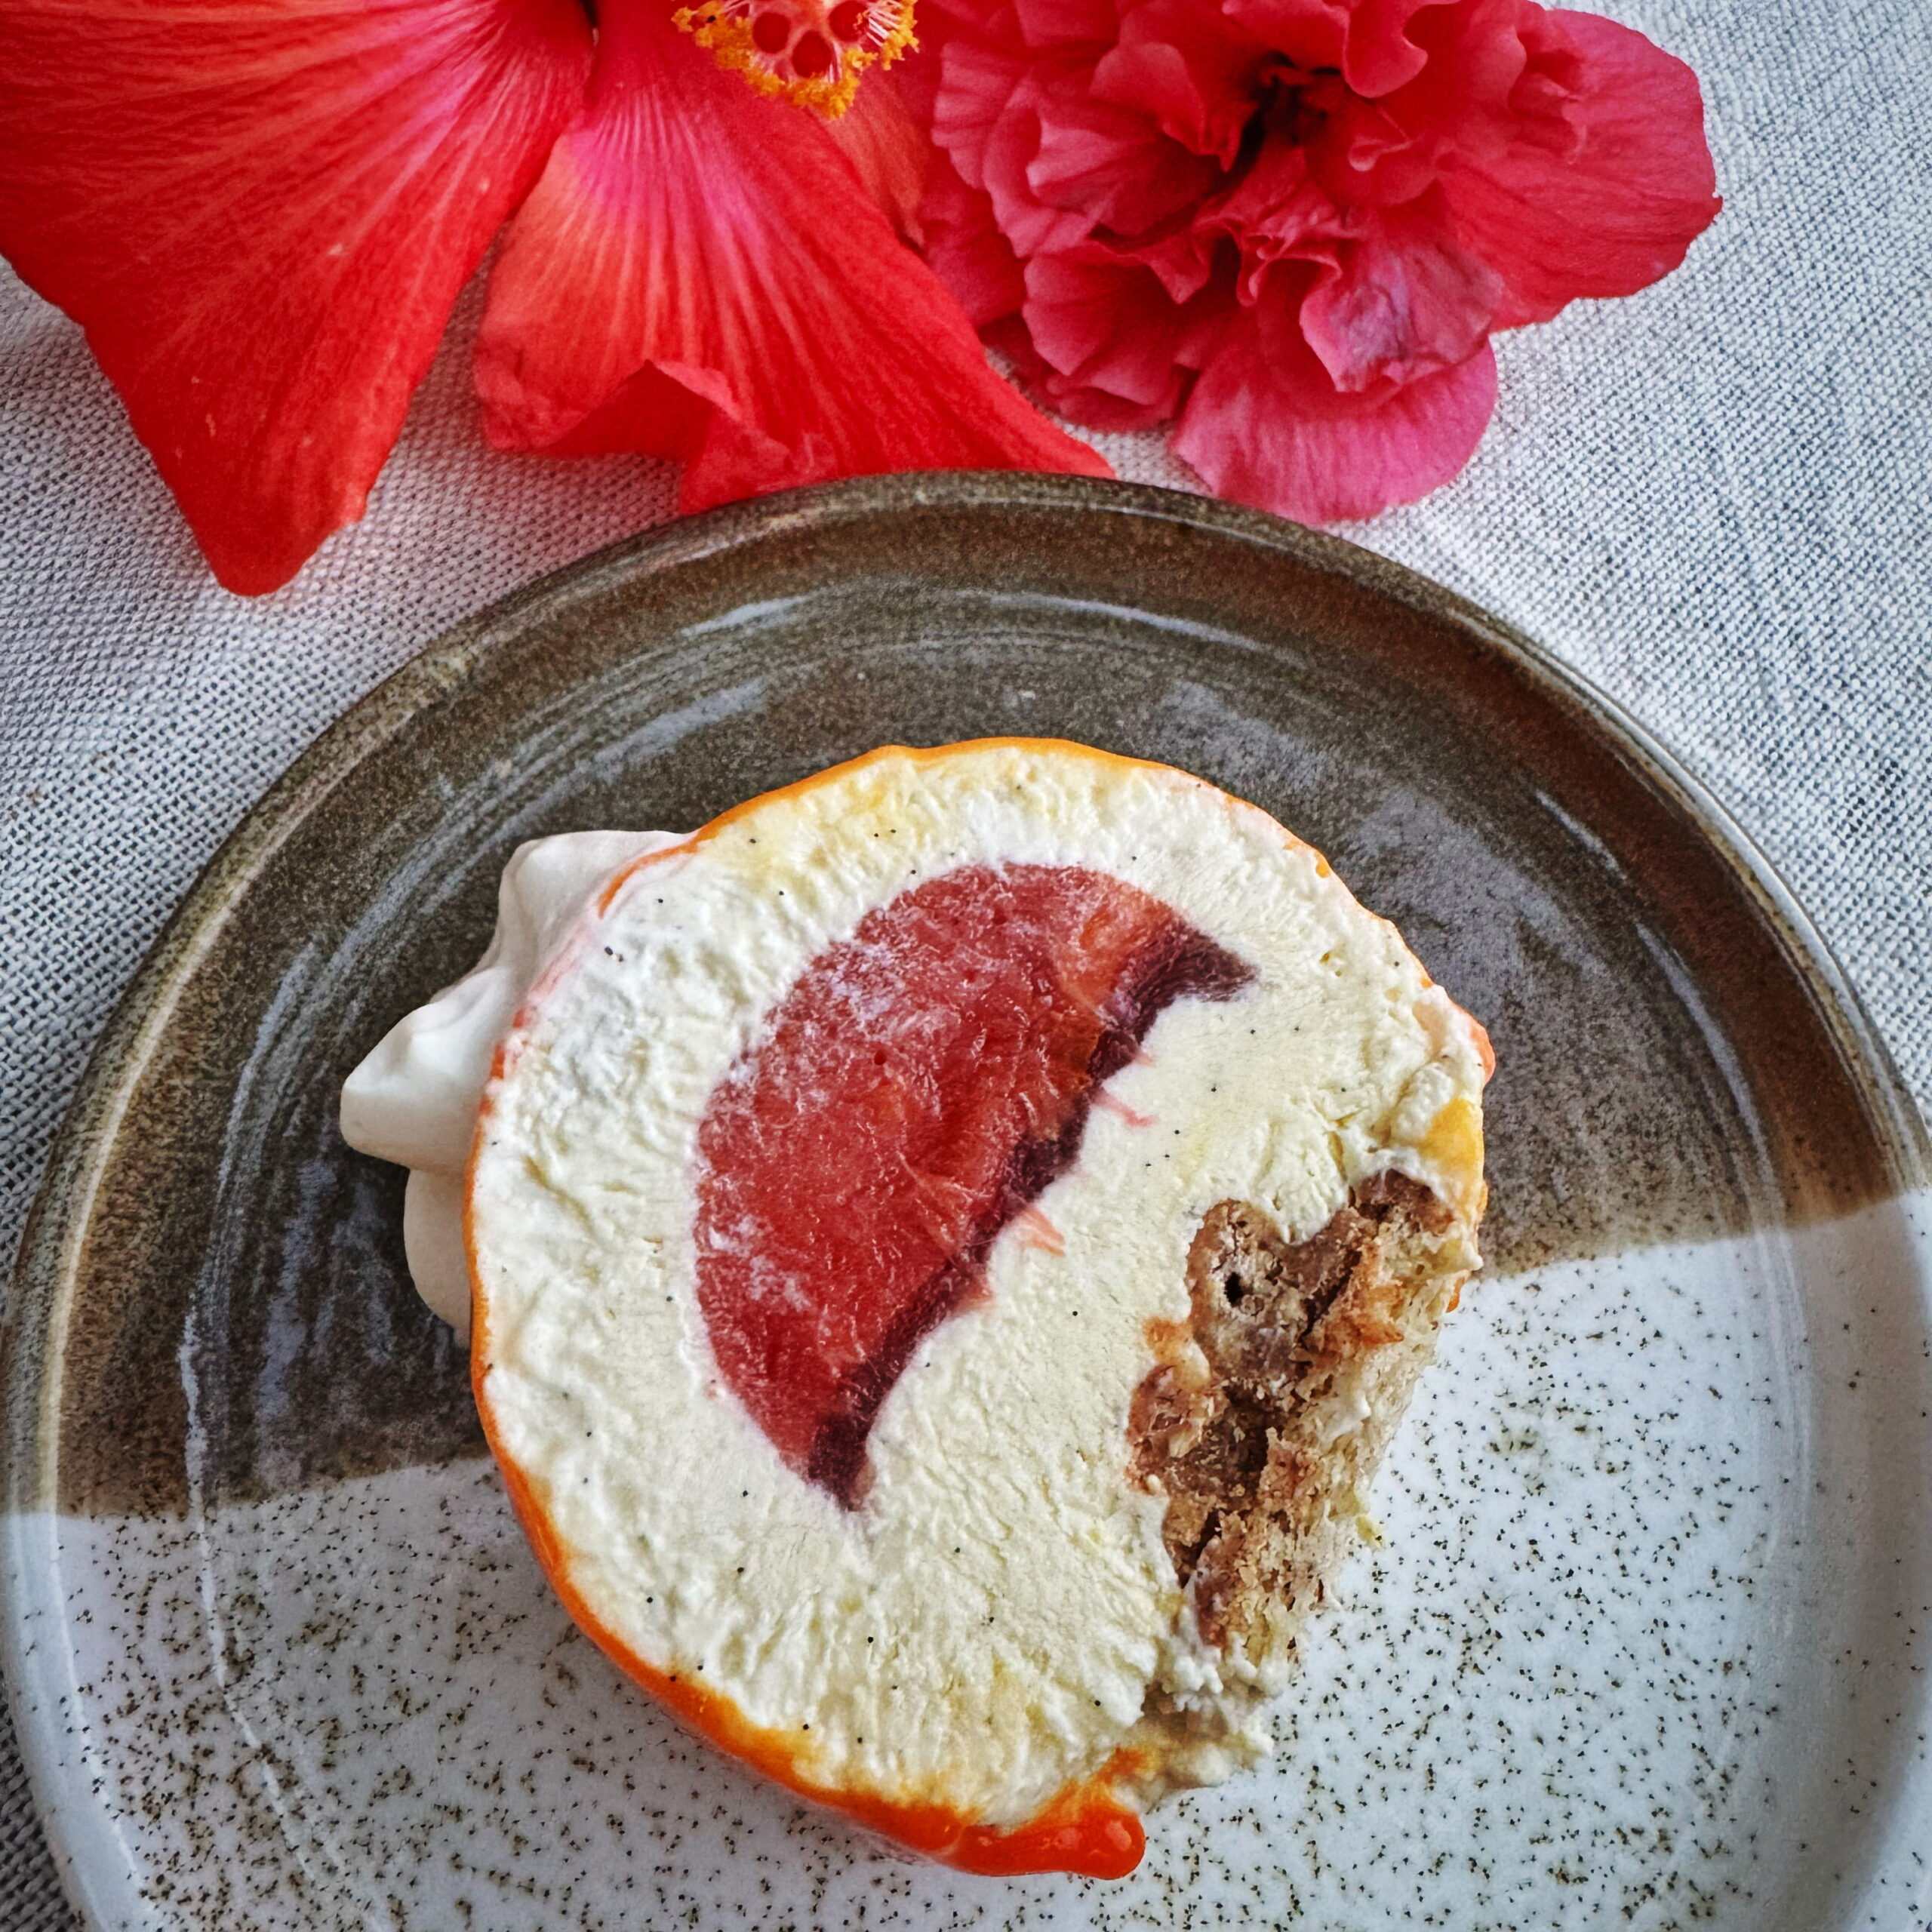
This elegant bûche de Noël combines a light vanilla bavaroise with a vibrant nectarine compote and a delicate hibiscus gel insert. An almond joconde base layered with almond crumble and a praliné–cocoa butter croustillant adds structure and texture. The result is a refined, modern festive dessert with balanced sweetness, gentle acidity and clean cuts, inspired by French pâtisserie techniques.
Ingredients
- 120 g fine almond flour
- 95 g icing sugar
- 180 g whole eggs
- 120 g egg whites
- 25 g caster sugar
- 20 g rice flour
- 10 g cornstarch or potato starch
- 30 g unsalted butter, melted and cooled
Gluten-free Almond Crumble
- 50 g almond flour
- 40 g butter, cold
- 40 g sugar
- 20 g rice flour
- Pinch of salt
Praliné & Cocoa Butter Croustillant Layer
- 60 g almond praliné paste
- 20 g cocoa butter
- 40-50 g baked almond crumble
Nectarine Compote Insert
- 180 g fresh nectarine purée
- 20 g sugar
- 3 g pectin NH
- 5 g lemon juice
Hibiscus Gel Insert
- 11 g dried hibiscus
- 120g water
- 15 g sugar
- 0.8 g agar agar
- 2-3 g lemon juice
Vanilla Bavaroise
- 330 g full-fat milk
- 1 vanilla bean or good vanilla paste
- 82 g egg yolks
- 66 g sugar
- 7.7 g gelatine
- 38 g cold water for blooming
- 400 g whipping cream (35%), cold
Mirror Glaze
- 80 g milk
- 200 g sugar
- 160 g whipping cream (35%)
- 110 g glucose syrup
- 14 g corn starch
- 8 g gelatine
- 40 g cold water for blooming
- several drops of orange and red food colouring
Whipping Cream (Piping)
- 70 g Whipping cream (35%, cold)
Instructions
Almond Joconde
1. Prepare the almond joconde by preheating the oven to 200°C fan.
2. Line a 34 × 41 cm baking tray with baking paper or a silicone mat.
3. Whip the almond flour, icing sugar and whole eggs using the whisk attachment until pale, thick and at ribbon stage.
4. In a separate bowl, whip the egg whites with the caster sugar to soft-medium peaks.
5. Fold one third of the meringue into the almond mixture to loosen it, then gently fold in the remaining meringue.
6. Sift together the rice flour, starch and salt and fold into the batter, then fold in the melted butter last.
7. Spread evenly in the prepared tray and bake for 8–10 minutes until lightly set and springy.
8. Cool completely, then freeze before trimming.
Almond Crumble
1. Prepare the almond crumble by rubbing the cold butter into the almond flour, rice flour, sugar and salt until coarse crumbs form.
2. Bake at 170°C until golden and dry. Cool completely.
Praliné Croustillant Layer
1. To make the praliné croustillant layer, melt the cocoa butter gently and mix it into the almond praliné paste.
2. Fold in the baked crumble.
3. Spread a thin, even layer over the frozen joconde and freeze again until firm.
4. Trim to fit the base of your bûche mould.
Nectarine Compote
1. For the nectarine compote, mix the sugar with the pectin NH.
2. Heat the nectarine purée to around 40°C, whisk in the sugar-pectin mixture and bring to a boil.
3. Cook briefly for about 30–60 seconds, remove from heat and add the lemon juice.
4. Pour into the insert mould to approximately two thirds of the insert height and freeze completely.
Hibiscus Gel
1. Prepare the hibiscus gel by first making a strong hot hibiscus infusion and weighing out 85 g.
2. Whisk the agar agar into the cold infusion, bring to a full boil and boil for 30 seconds.
3. Add the sugar, dissolve fully, remove from heat and add the lemon juice.
4. Pour a thin layer over the frozen nectarine compote and freeze again until fully set.
Vanilla Bavaroise
1. For the vanilla bavaroise, bloom the gelatine in cold water for at least 10 minutes.
2. Heat the milk with the vanilla until steaming. Remove from the heat and cover with cling film. Let infuse for 15 minutes.
3. After, remove the vanilla bean and warm up again.
3. Whisk the egg yolks with the sugar, then temper with the hot milk.
4. Cook gently to 82–84°C, stirring constantly.
5. Remove from heat, add the bloomed gelatine and stir until fully dissolved.
6. Strain if necessary and allow to cool to 30–35°C.
7. Whip the cream to soft peaks and fold it gently into the anglaise in three additions.
Mirror Glaze
1. Bloom the gelatine in cold water for at least 10 minutes.
2. In a bowl, stir together sugar and corn starch.
2. In a pot, combine milk, whipping cream and glucose syrup. Gently heat to around 40°C.
3. Then, add in the sugar and corn starch.
4. Bring to a boil and cook for 1 minute
5. Remove from heat and add in the bloomed gelatine.
6. Transfer the glaze into a tall blender jug.
7. Adding a few drops of orange food colouring at a time, blend until smooth. Be careful not to incorporate bubbles.
8. Once a beautiful orange is reached, transfer 1/3 into a smaller jug. Carefully add a bit of red food colouring and blend together.
9. Cover both jugs with cling film, making sure it touches the surface. Let it cool to 30-35°C (ideal temp for pouring).
Assembly
1. Assemble the bûche by pouring a layer of bavaroise into the mould and coating the sides.
2. Insert the frozen nectarine and hibiscus insert, then cover with more bavaroise.
3. Finish by placing the joconde base with the croustillant side facing the mousse.
4. Level and freeze solid overnight.
5. Once the glaze is at the right temperature, glaze the frozen entremets.
6. Whip the whipping cream and pipe your desired decoration on top. Decorate with nectarine slices, hibiscus gel and fresh or dried hibiscus leaves.
Notes
As with any entremets, several components will need freezing before the assembly and final freezing.
Make a good plan ahead of time, as it will be necessary to make this cake over several days.
- Prep Time: 3
- Freezing: 2 nights, or at least 5-6h each
- Cook Time: 45
- Category: Dessert
- Method: French pâtisserie, layered entremets
- Cuisine: French
Seriously easy Macadamia Croissants
Welcome to Week 3: The Cake I Made
I’ve always been very pro home-baked everything. There’s something deeply satisfying about making pastries from scratch, understanding the process, and seeing it all come together in your own kitchen.
But these croissants reminded me of something important.
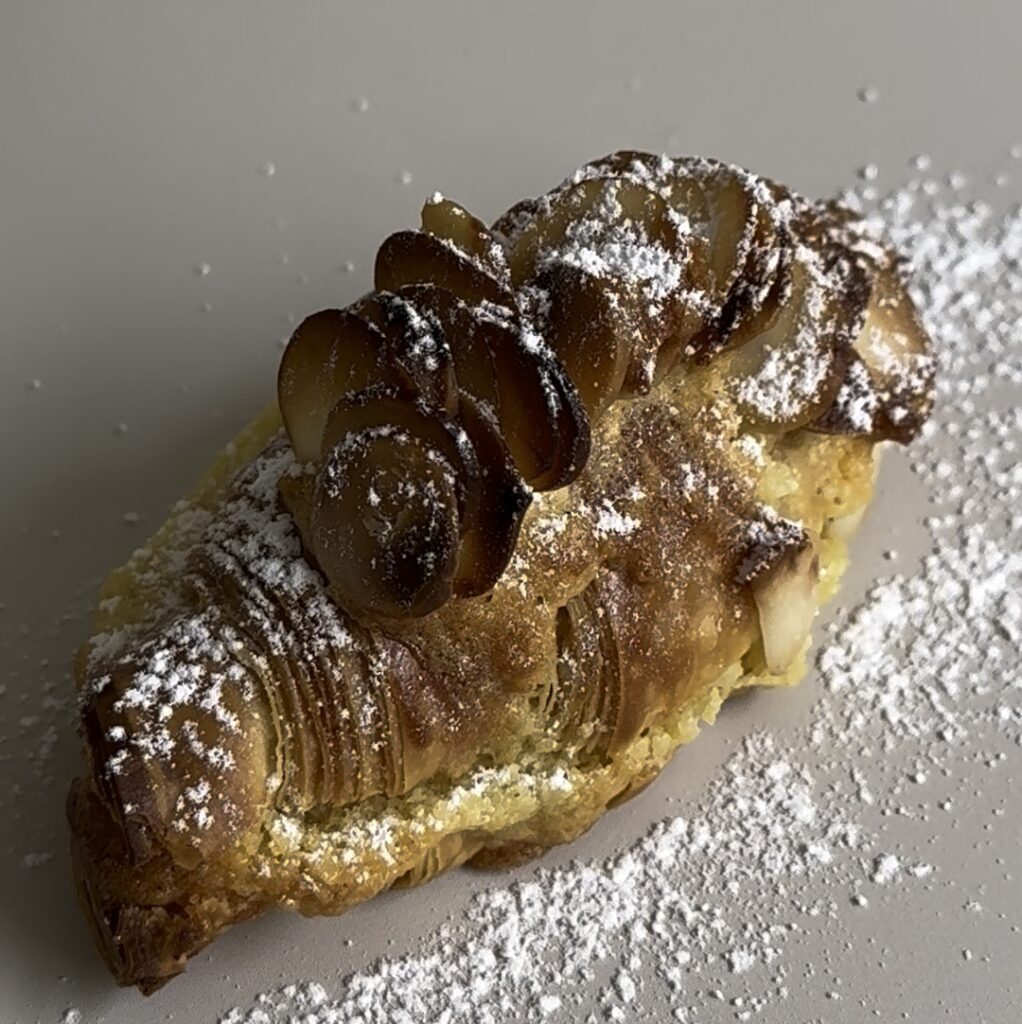
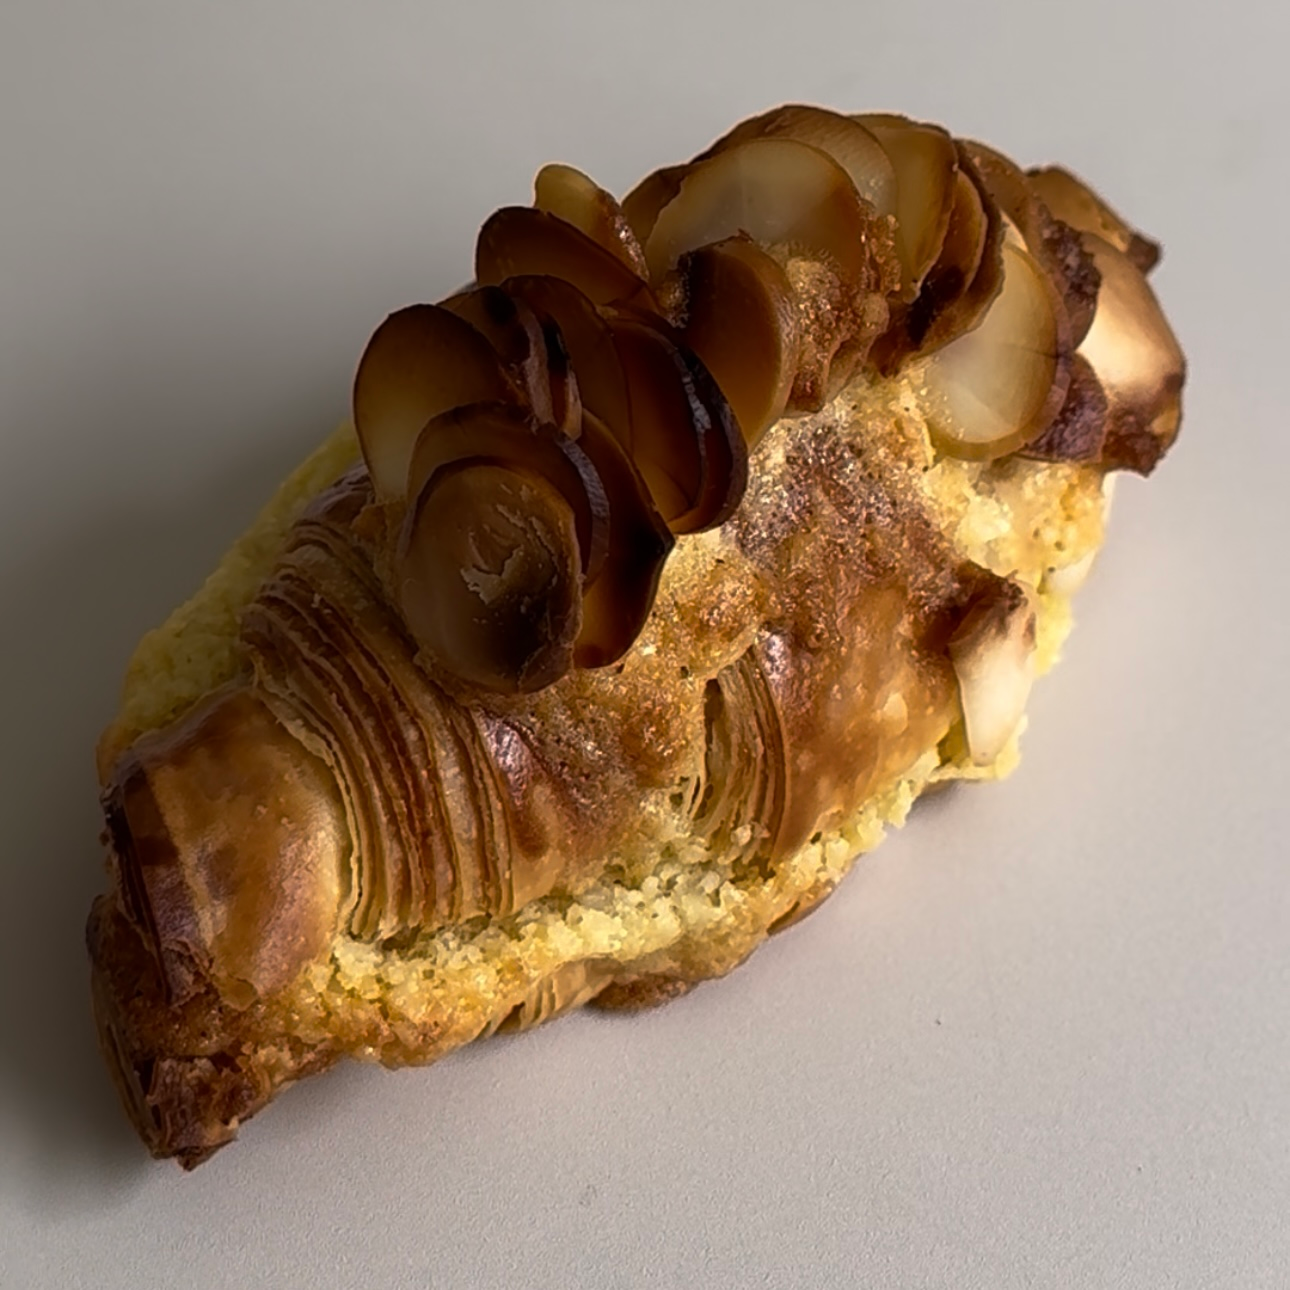
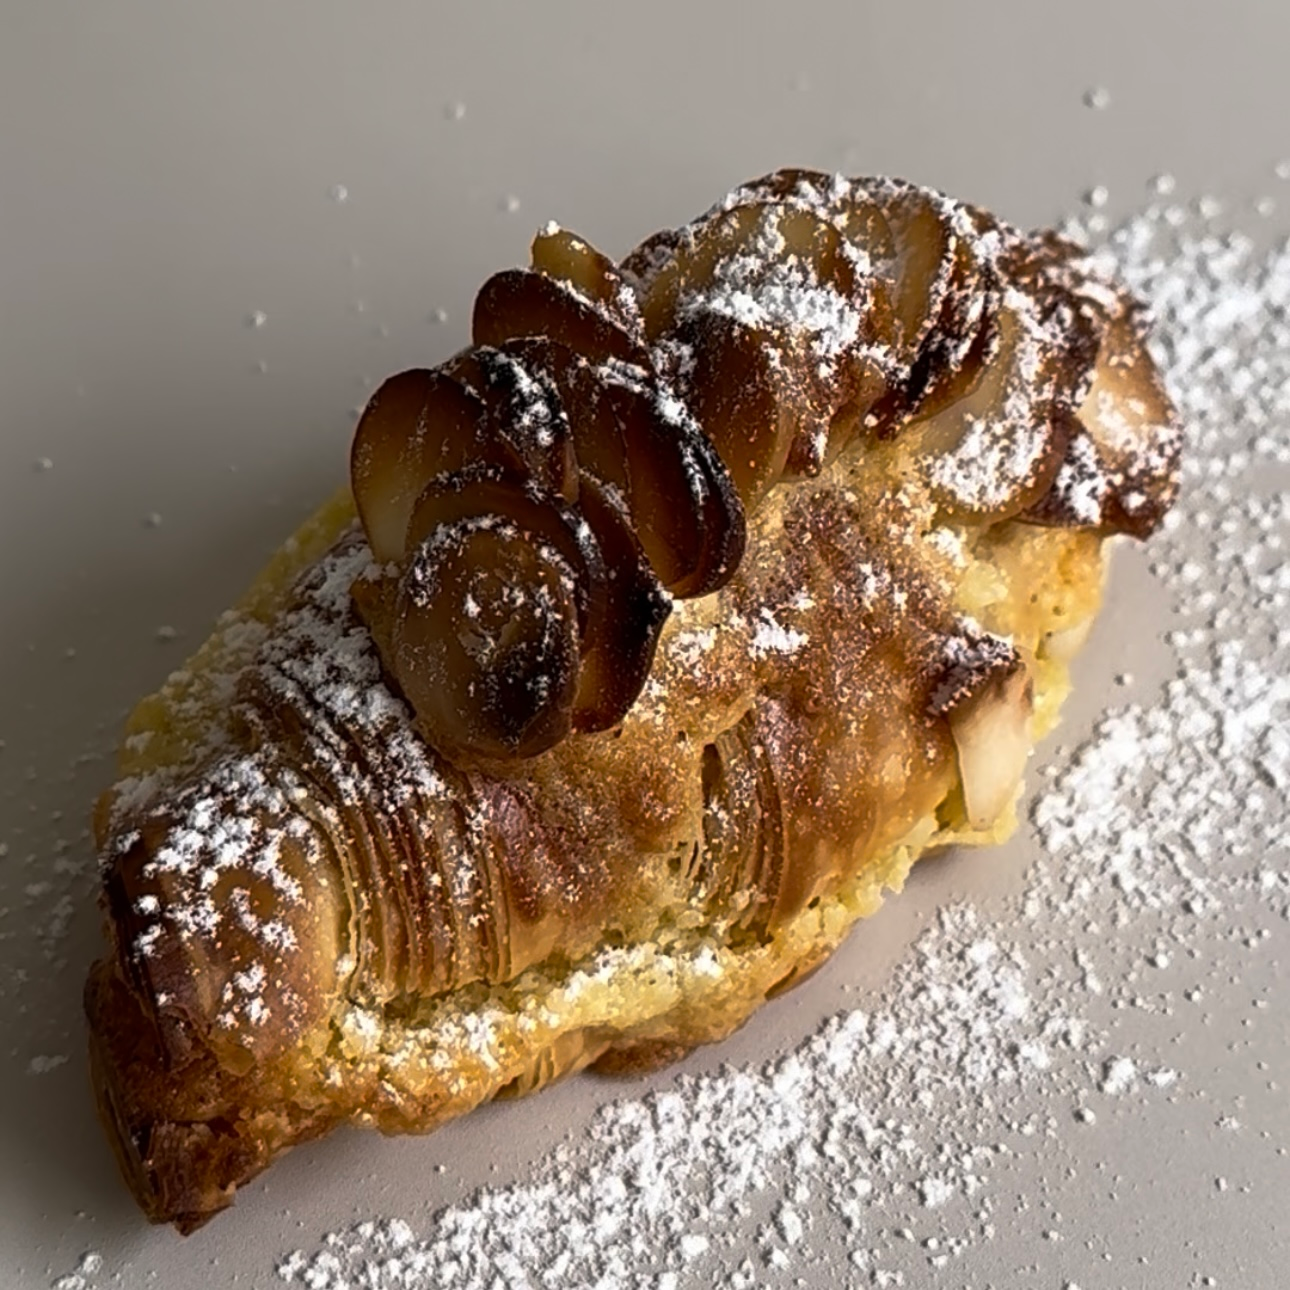
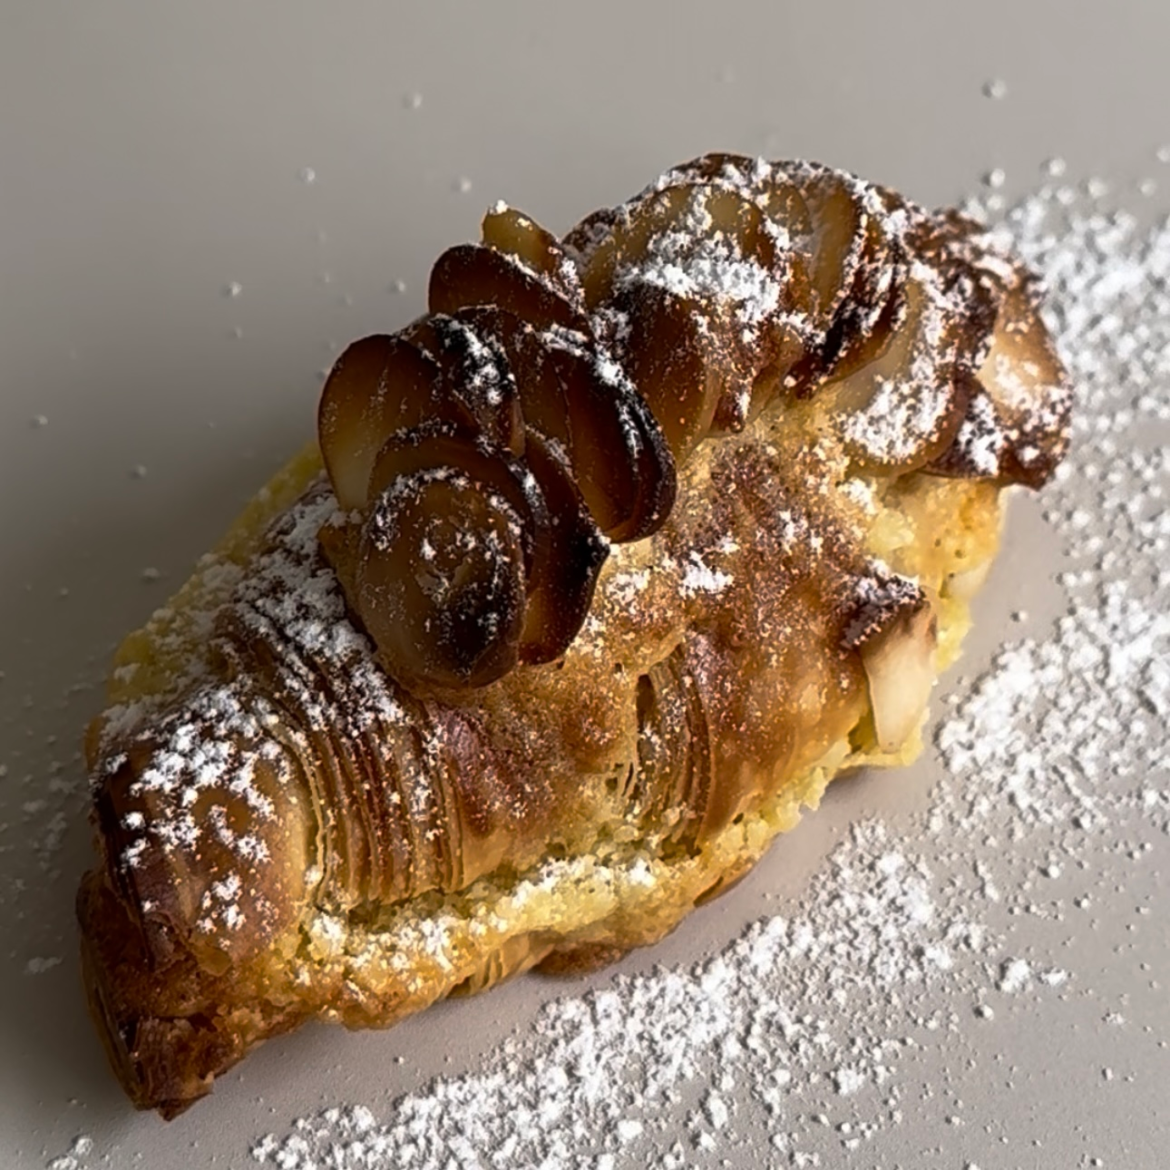
These Macadamia Croissants were born from curiosity, not mastery. I made sourdough croissants for the very first time and turned them into macadamia croissants using a simple, flavour-packed filling made with local macadamias.
And while I’m not here to teach sourdough croissants just yet, I am here to show you that you don’t need to master every technique to create something beautiful and delicious.
This recipe is about keeping things achievable, enjoyable, and full of flavour — whether you bake your croissants from scratch or pick them up from your favourite bakery.
Why this cake means so much to me
This bake means a lot to me because it represents a shift in how I approach pâtisserie at home.
Trying sourdough croissants for the first time was exciting… and humbling. It reminded me that learning is a process, and that it’s okay not to rush into teaching something before you truly feel ready. Instead of hiding that, I chose to lean into it.
What I do feel confident about is flavour. And this macadamia filling turned something simple into something really special. It was a reminder that great pastries aren’t always about the most complex techniques — often, they’re about thoughtful choices, good ingredients, and allowing yourself to enjoy the process.
This is exactly the mindset I want you to carry into the coming year: clarity over complexity, and baking that feels satisfying rather than stressful.
My tips for perfect Macadamia Croissants
You can absolutely make this recipe as simple or as involved as you like. Here are a few tips to get the best result — without overcomplicating things:
Use Croissants You Truly Enjoy Eating On Their Own
- Whether homemade or from a bakery, the pure croissant matters. If the croissant is buttery and flaky, you’re already halfway there.
Don’t Overfill
- The macadamia filling should enhance the croissant, not overpower it. A generous but controlled amount gives the best texture after baking.
- Remember, you want the filling in the croissant, not leaking everywhere.
Bake Just Until Golden And Fragrant
-
- You’re not baking from raw – you’re warming, crisping and allowing the filling to set and caramelise slightly.
Let The Macadamia Croissants Rest Briefly Before Serving
-
- This helps the filling settle and makes them easier to eat (and enjoy 😊)
Most importantly: don’t overthink it. This recipe is meant to feel approachable and rewarding.
Make the Macadamia Croissants your own
Once you understand the base idea, this recipe becomes incredibly versatile.
You can easily swap macadamias for:
-
almonds
-
hazelnuts
-
pistachios
-
or a mix of nuts you already have at home
You can also play with:
-
a touch of citrus zest
-
a hint of spice
-
or even a small amount of chocolate for a richer version
This is where baking becomes fun. Use what you love, work with what you have, and allow yourself to experiment without pressure. The goal isn’t perfection — it’s creating something you’re proud to share.


Easy Macadamia Croissant Filling
- Author: Jasmin
- Total Time: 35 minutes
- Yield: Filling for 4 standard-sized croissants 1x
- Diet: Vegetarian
Description
This macadamia filling is rich, buttery and gently sweet, allowing the flavour of macadamias to shine without overpowering the croissant itself. It’s designed for home bakers who want something impressive but achievable, and it works beautifully whether you use homemade or bakery-bought croissants.
Ingredients
- 100 g macadamias
- 100 g butter
- 100 g egg
- 50 g castor sugar
- 20g icing sugar
Instructions
1. Preheat your oven to 170°C (fan).
2. Place the macadamia nuts into a blender or food processor and blend until finely ground. Be careful not to overblend, as macadamias are high in fat and can turn into a paste if blended for too long.
3. In a bowl, cream the softened butter and sugar together until smooth and well combined. Add the egg and mix until fully incorporated. Stir in the ground macadamias, mixing just until you have a soft, spreadable filling.
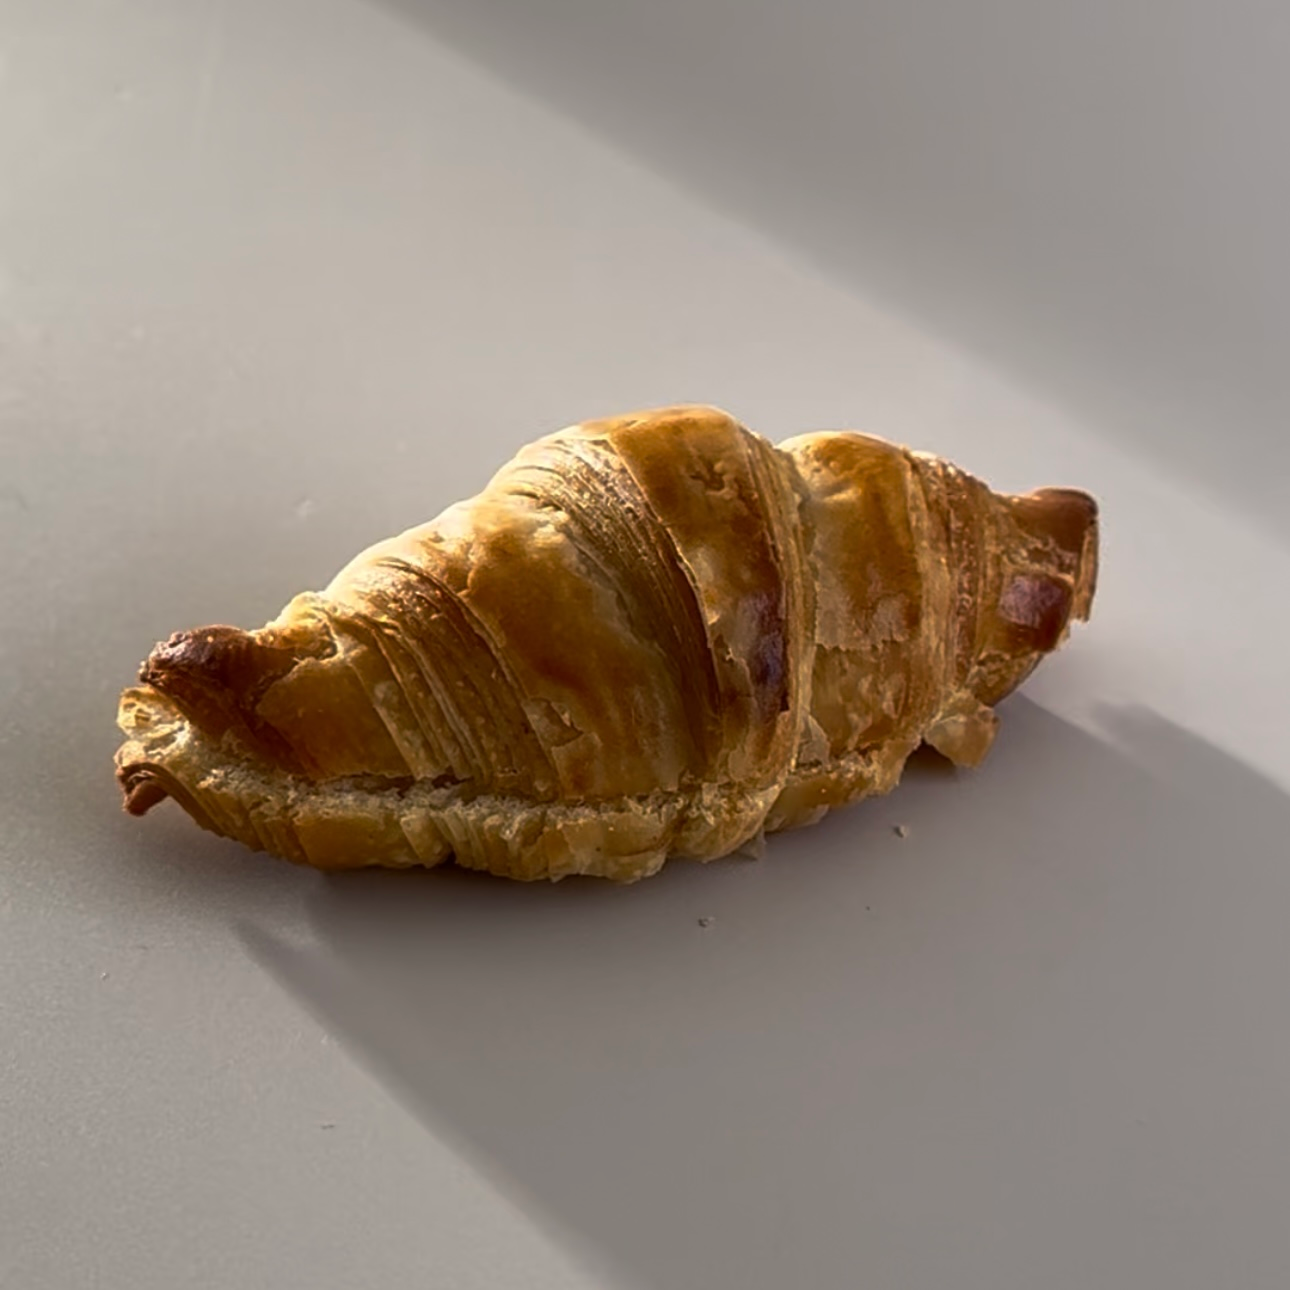
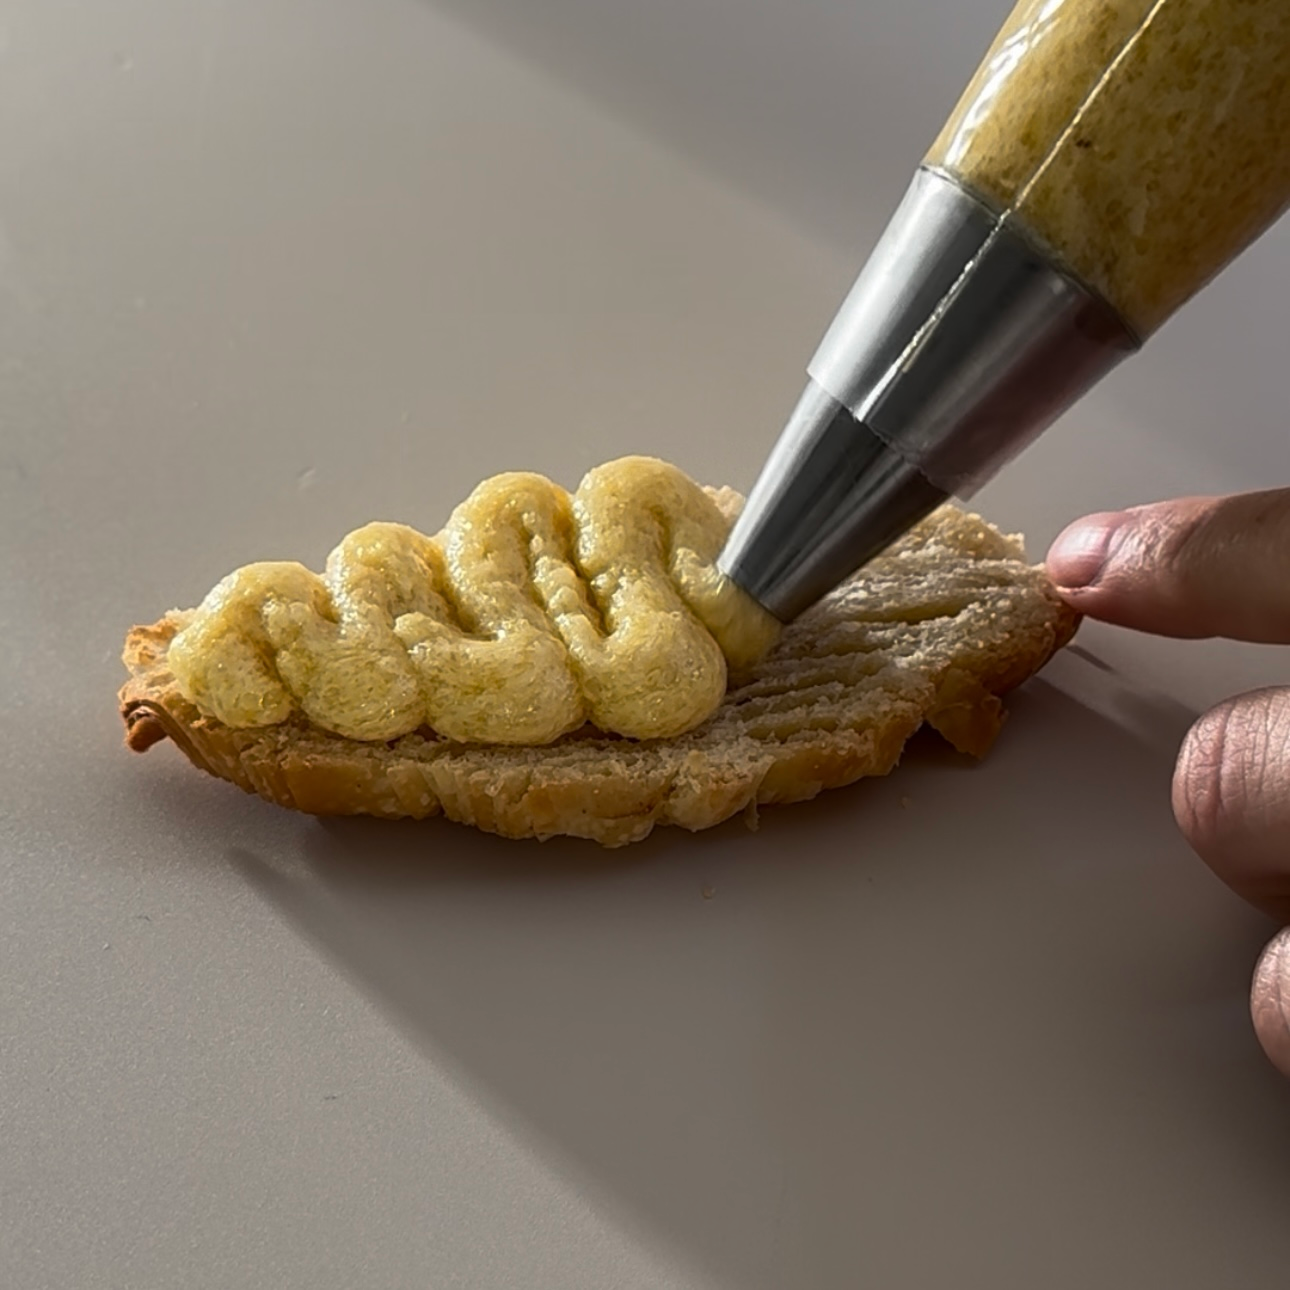
4. Slice the croissants lengthwise. You can but don’t have to cut all the way through. Fill each croissant generously with the macadamia mixture. It’s easier if you use a piping bag but you don’t have to.
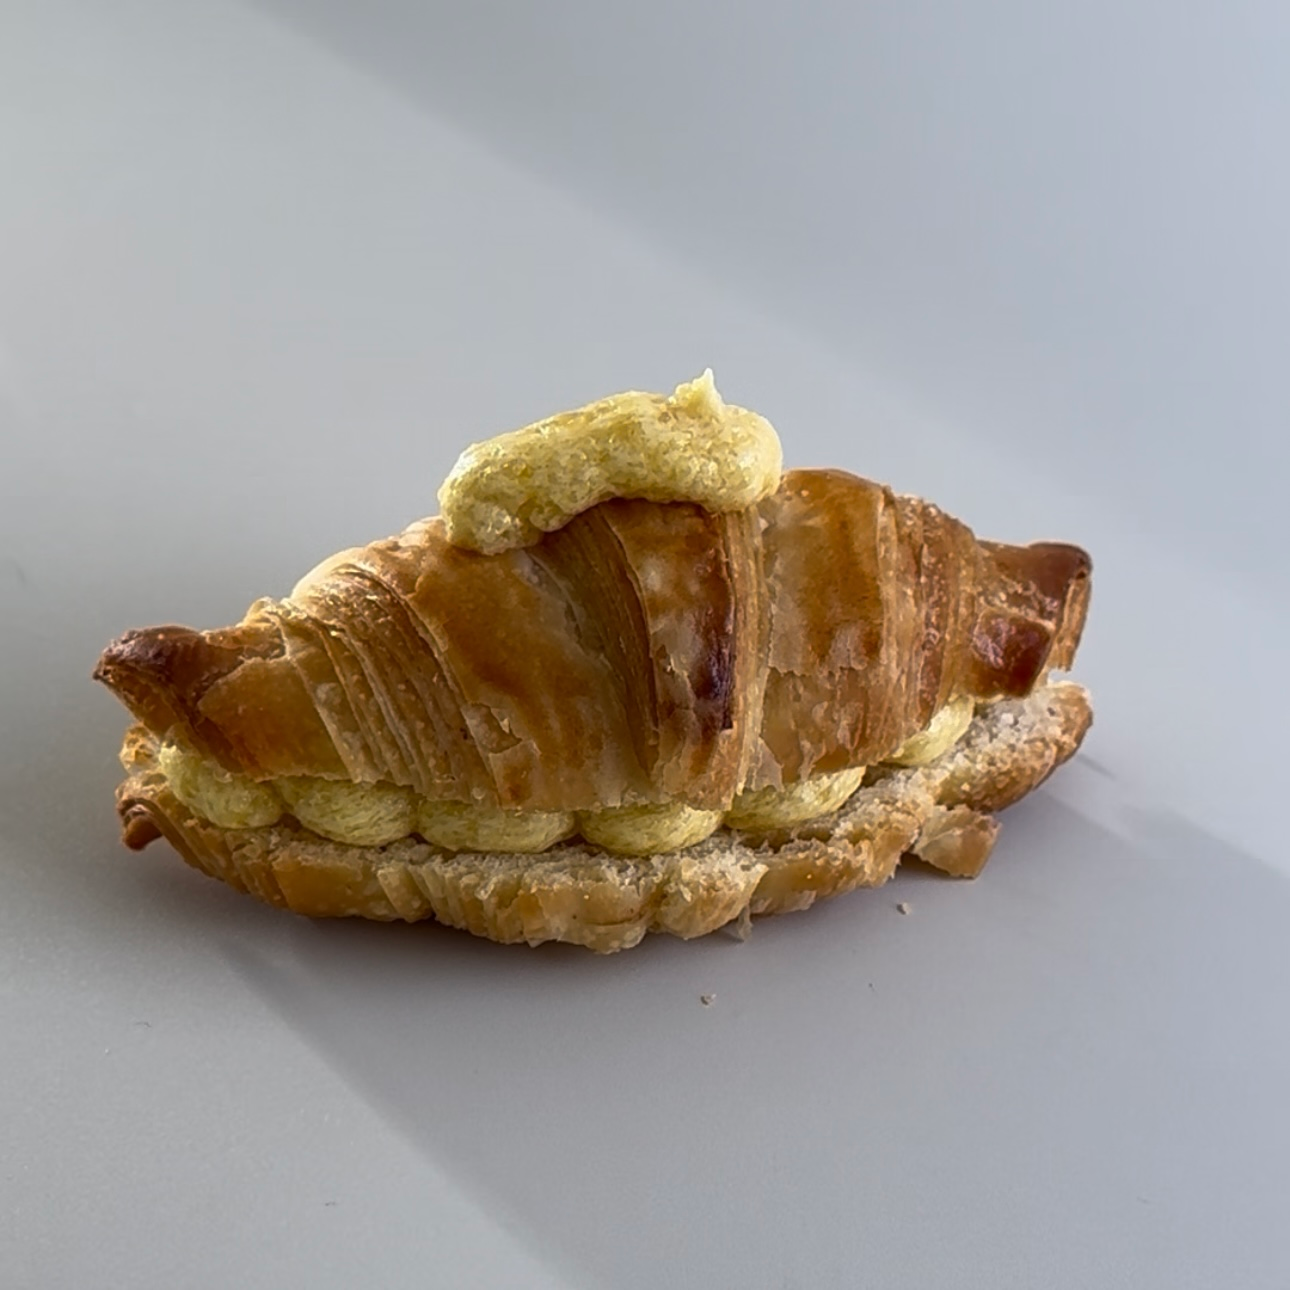
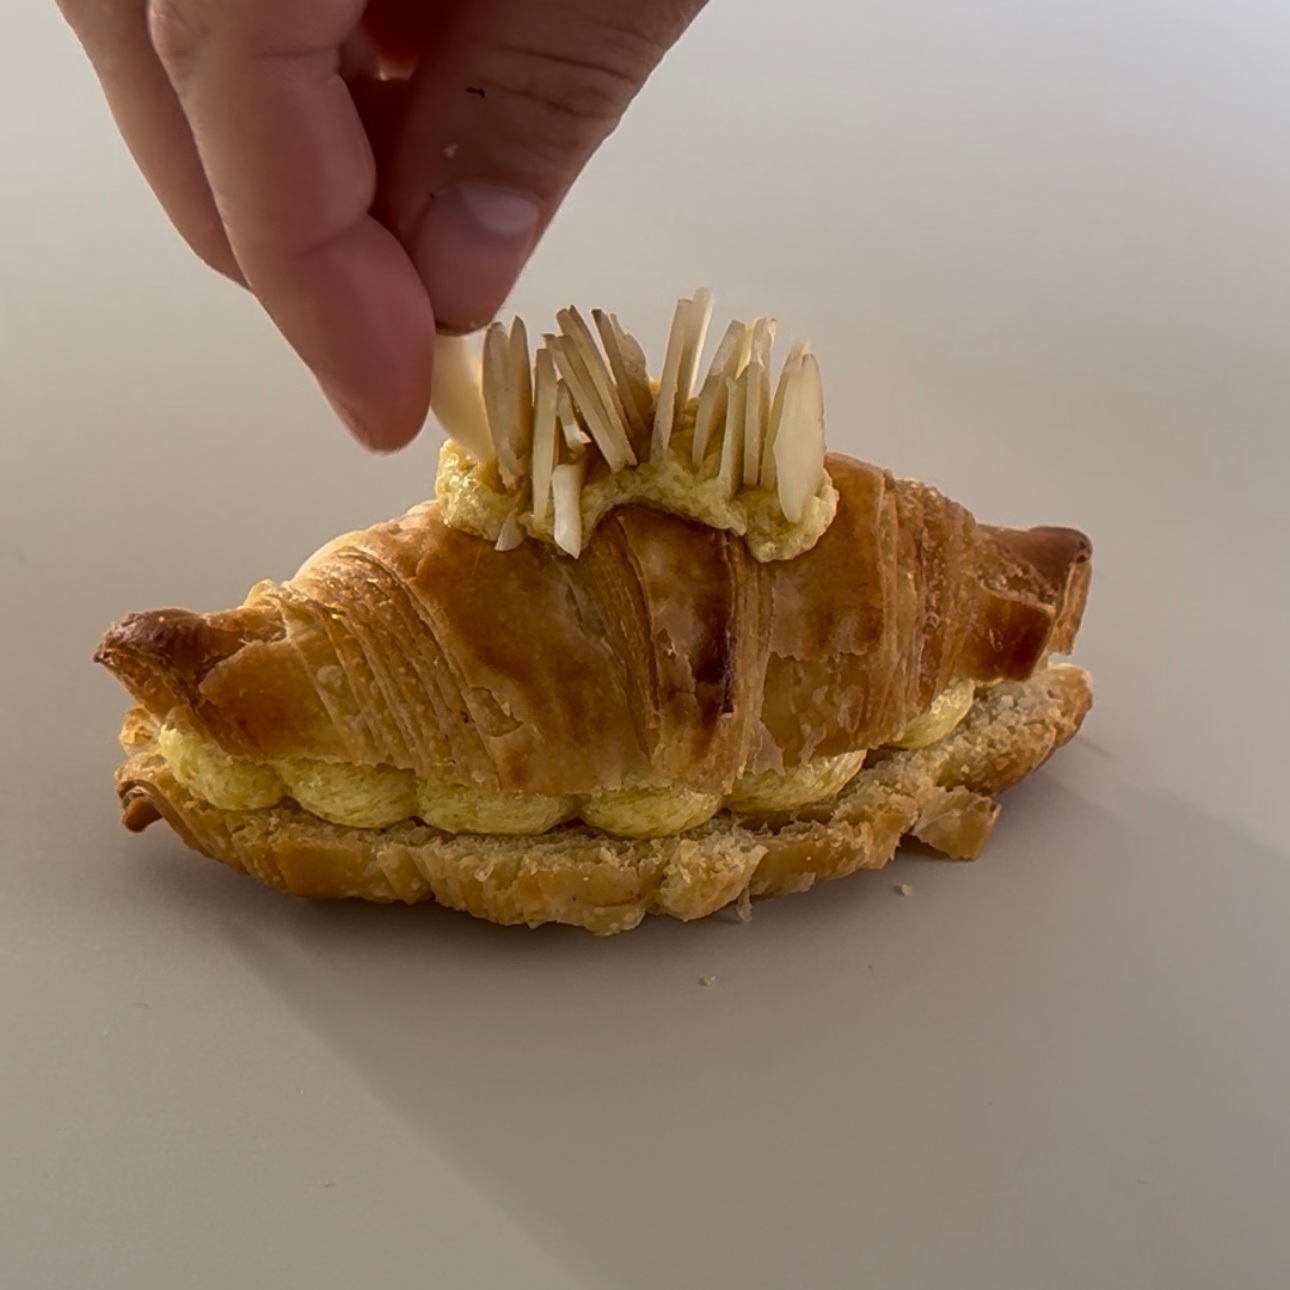
5. Close the croissant and pipe a bit of macadamia cream on top. Press pieces of macadamia into the cream.
5. Place on a baking tray lined with baking paper and bake for about 17-20 minutes, or until the filling is set and lightly golden and the croissants are crisp and fragrant.
6. Allow to cool slightly and dust with icing sugar before serving.
Notes
This filling is intentionally not overly sweet, letting the natural richness of macadamias come through. You can adjust the sugar slightly to taste, but keeping it lower helps the croissant remain balanced rather than cloying. The filling can be prepared a day ahead and stored covered in the fridge. Bring it back to room temperature before using so it spreads easily.
Give it a try and if you have any questions at all, feel free to reach out here.
- Prep Time: 15
- Cook Time: 20
- Category: Pastry filling
- Method: Baking
- Cuisine: French-inspired
You may also like
Summery Peach & Macadamia Tartlets
Welcome to Week 2: The Cake I Made
For me, there is little more satisfying than baking with locally grown ingredients. There’s something grounding and joyful about creating a dessert that reflects the place you live in — and its seasons.
Now imagine how I felt when I didn’t just have a handful of locally grown macadamias, but also the juiciest peaches. Both grown right here, and both full of flavour, asking to be turned into something special.
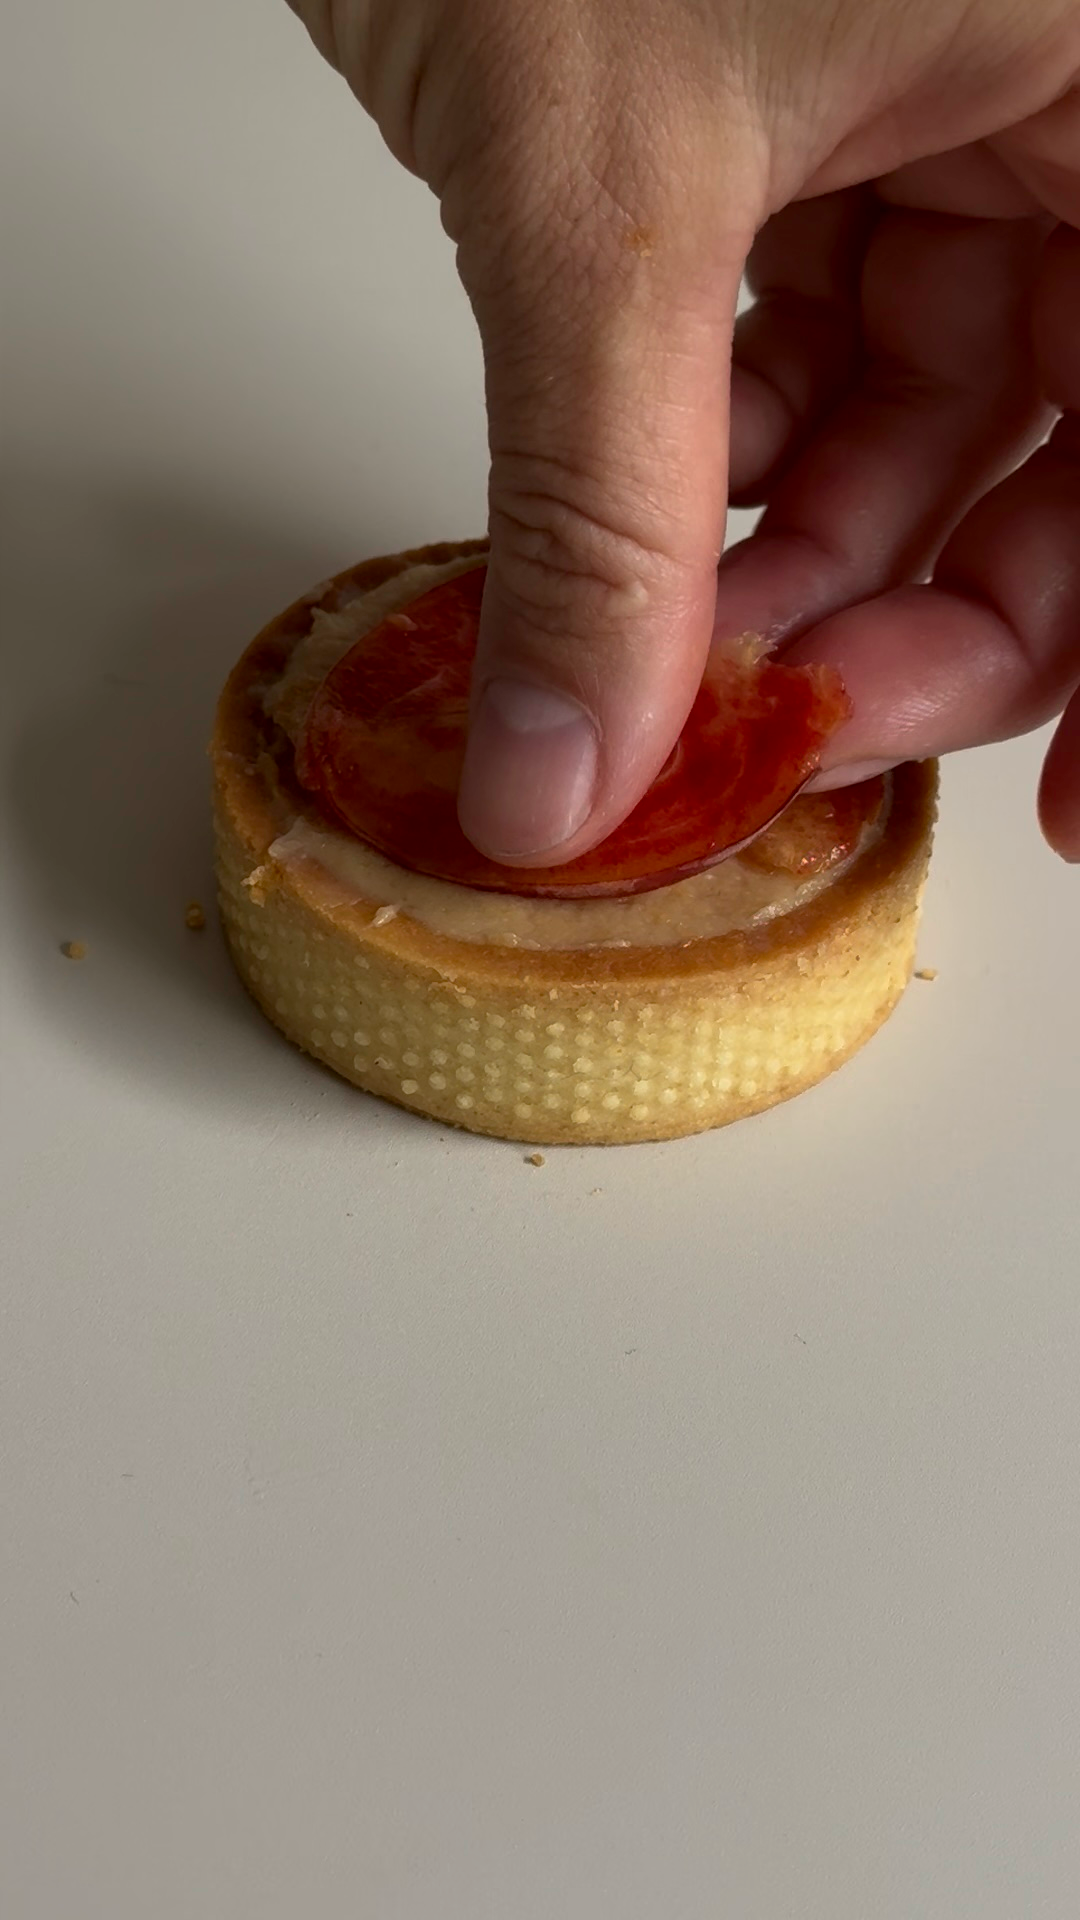
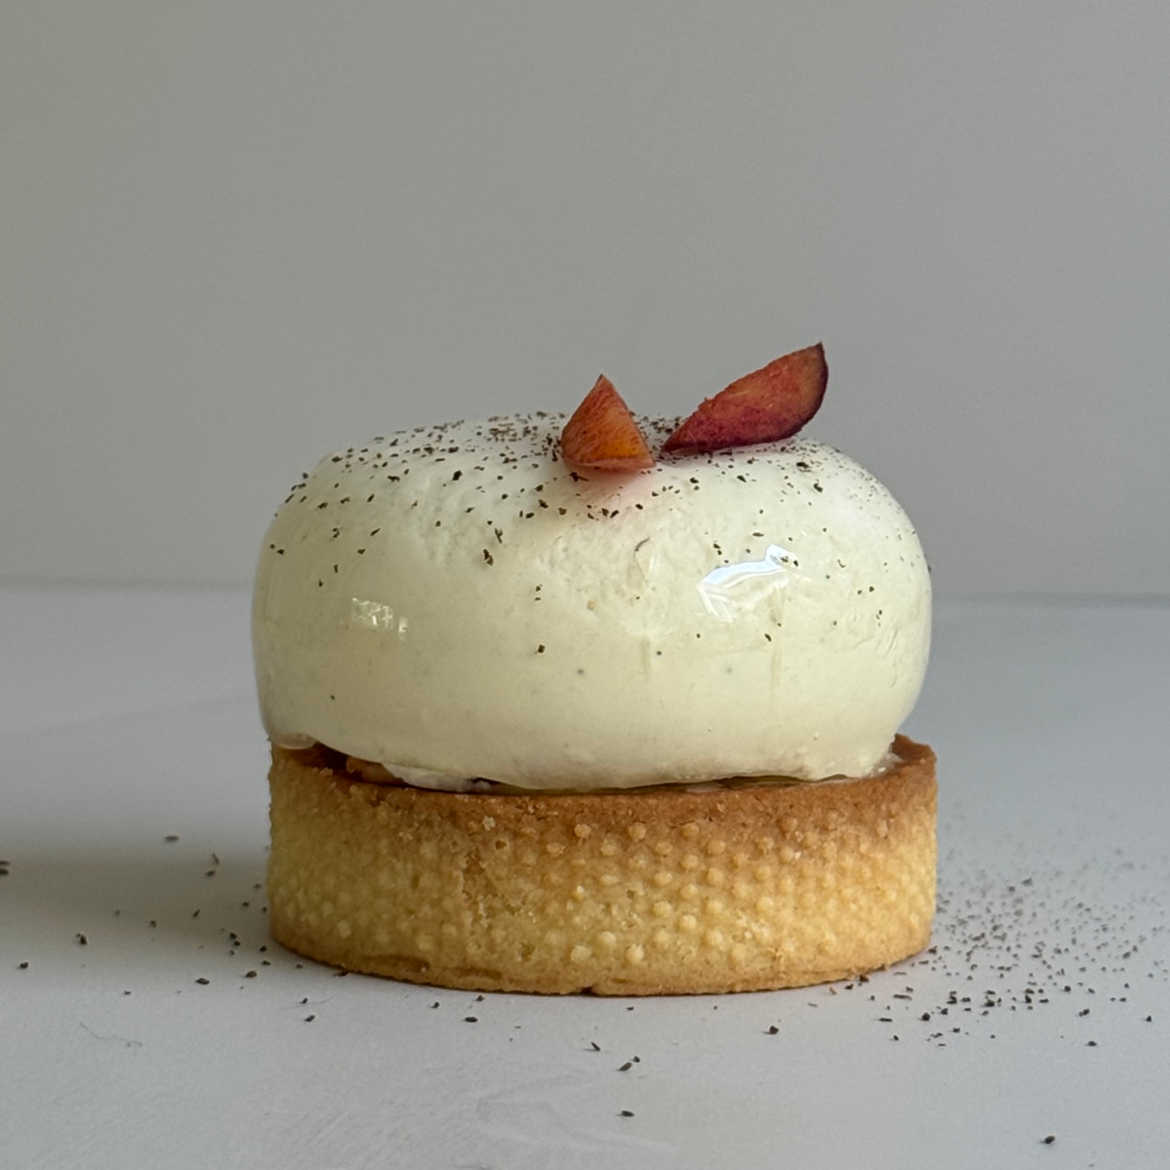
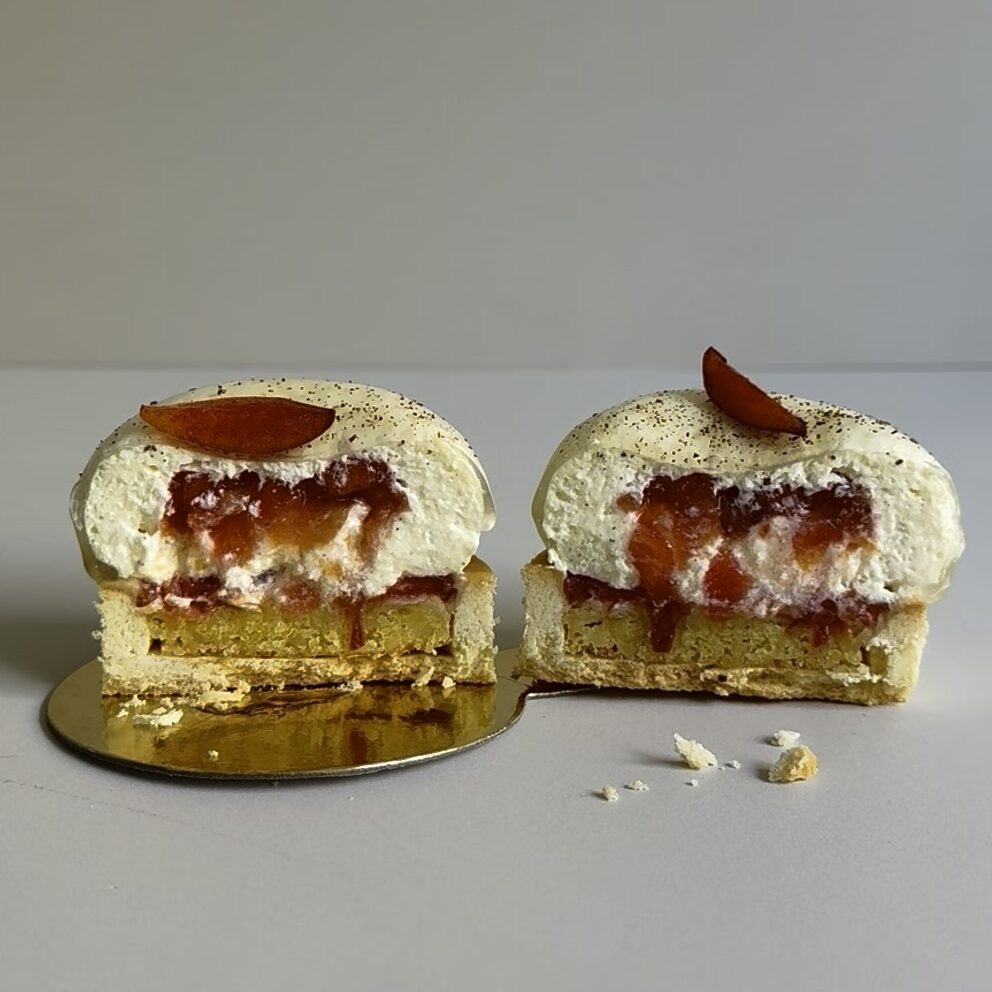
These tartlets are my hymn to summer: a crunchy tart base, a soft and nutty macadamia cream, and a fruity, silky peach crémeux at the centre. All of that is finished with a light Crème Bavaroise dome hiding a peach insert — a little surprise waiting inside each bite.
Add a glossy glaze, place the dome on its tart shell, garnish with fresh peach slices, et voilà: this is what the perfect summer tartlet looks like.
Why this cake means so much to me
French pâtisserie always felt like something reserved for professionals, not something I’d one day be confident enough to develop on my own.
Nor could I have imagined that I’d eventually be living on a tiny subtropical island in the middle of the Pacific — a place where ingredients are precious, seasonal, and often limited. Nothing about my life today is what I pictured back then, yet I’m grateful for exactly where I’ve landed.
Along the way, I’ve learned not only how to follow a pâtisserie recipe, but how to build one myself. These tartlets feel like a celebration of both worlds: the technical elegance of French pâtisserie and the beauty of using what grows right here, right now.
They’re my little tribute to seasonality, creativity, and the joy of baking with what’s around you.
My tips for a Perfect peachy tartlet
How to Get That Perfect Tart Shell
- Keep the dough cold: Chill your pâte sucrée before rolling and then again before baking. This keeps the edges sharp and the base flat.
- Dock or use baking beans: To avoid puffing, gently prick the base with a fork or blind-bake using weights (such as beans or lentils).
- Aim for even thickness: Try to apply the same amount of pressure while rolling out your dough. I know this is tricky, so here’s a tip: Roll, then rotate the dough a quarter, roll again, turn again etc. This way, you will automatically roll more evenly. To me, an even thickness is more important than the right thickness (2-3 mm).
How to Get That Light & Airy, Yet Stable Bavaroise Dome
A Crème Bavaroise is essentially Crème Anglaise with whipped cream folded into. Keep the following things in mind:
- Master your Crème Anglaise: Milk, egg yolks and sugar get heated to 83° C. This step is crucial as it cooks eggs sufficiently to make them safe for consumption without scrambling them. This step also thickens the cream to a nice, velvety sauce. With experience, you can tell my eye when your cream is done, until then use a probe thermometer to be sure.
- Fold gently: When adding whipped cream to the base mixture, fold rather than stir to keep the Bavaroise airy.
- Be prepared: Have your peach insert frozen and ready to go. Once the bavaroise is finished, you will want to move quickly.
Make the Summery Peach & Macadamia Tartlets your own
As you know by now, I love making recipes my own.
And I want to encourage you to do the same.
Use a recipe you have tried before and that you’re comfortable with and change things to make it your version of a cake.
Here are some ideas for this tartlet:
- Change peaches for nectarines, apricots or plums
- Swap macadamias for almonds, pistachios, pecans or hazelnuts to change the flavour profile of the cream
- Play with the format: Instead of making small tartlets, make one 16 or 18 cm tart instead
- Decorate the way you want to: Add edible flowers or herbs like thyme or mint
Encourage yourself to be curious. The beauty of pâtisserie lies in the endless options to tweak, refine, and reinvent — and this tartlet is the perfect canvas to start.
Still not sure where to start? Head over to my Fraisier recipe and have a look at all the different versions I made of it in the past!

Peach & Macadamia Tartlets
- Author: Jasmin
Ingredients
- 120g flour
- 72g cold butter
- 48g icing sugar
- 10g almond powder
- 23g egg
- 1.2g salt
- 50g soft butter
- 30g sugar
- 50g egg
- 50g macadamia powder
- 120g peach purée
- 30g sugar
- a small pinch of salt
- 35g egg yolks
- 30 g cold butter, cubed.
- 90g peach purée
- 60g fresh peach
- 10g sugar
- 1g pectin NH
- 120g milk
- 0.5g vanilla powder
- 30 egg yolks
- 48 sugar
- 3.7g gelatine
- 22g water (for gelatine)
- 120 g whipping cream
- 60g water
- 50g sugar
- 40g glucose syrup
- 2g gelatine
- 10g water (for gelatine)
- 3g lemon juice
- Vanilla powder
- Slices of fresh peach
Instructions
Pâte Sucrée
1. In a bowl, whisk together the flour, icing sugar, almond powder, and salt.
2. Add the cold butter cubes. With your fingertips, rub the butter into the dry mix until it becomes sandy, like fine breadcrumbs. Don’t overwork — keep the butter cold. You can also use a stand mixer with a paddle attachment.
3. Add the 20 g of beaten egg, and mix with a spatula or fingertips until the dough just comes together. If it feels dry, press it rather than knead it; it will hydrate as it rests.
4. Gently press the dough into a disc. Do not knead. Wrap in cling film.
5. Refrigerate for at least 1 hour, or overnight for best structure.
6. Lightly flour your surface. Roll the dough to 2–2.5 mm thickness. Keep rotating and lifting the dough to avoid sticking.
7. Cut 7cm bases first, then 20 cm strips for the sides. Keep the cool, either in the fridge or freezer until you use them.
8. Line your 8 cm perforated tart rings, pressing gently to avoid stretching.
9. Refrigerate or freeze the lined tart shells for 30–60 minutes to prevent shrinking.
Keep in the fridge until the Macadamia Cream is done.
Macadamia Cream
1. In a small bowl, beat the soft butter with the sugar until pale and slightly fluffy. No need to over-cream — just combined and smooth.
2. Add the egg in several additions, mixing well after each to keep the mixture smooth. If it looks slightly curdled, that’s fine — it will come together when the nuts go in.
3. Fold in the ground macadamias until fully incorporated. The mixture should be soft but pipeable or spoonable.
4. If the mix feels loose, refrigerate for 10–15 minutes to firm slightly before piping.
5. Pipe or spoon the cream into your raw tart shells, filling them maximum halfway.
6. Bake at 160–170°C until the cream is set and lightly golden on top, usually 12–16 minutes depending on your oven.
Peach Crémeux
1. In a small saucepan, warm the peach purée with sugar and salt over medium heat until just simmering.
2. In a separate bowl, whisk the egg yolks lightly. Gradually add a few tablespoons of the hot purée to the yolks, whisking constantly to avoid curdling.
3. Return the yolk-purée mixture to the saucepan. Cook over low heat, stirring constantly, until the mixture thickens slightly and coats the back of a spoon.
4. Remove from heat and let cool down to around 35°C.
5. Add the cold cubed butter and mix gently with a hand blender until smooth and glossy.
6. Pipe or spoon the peach crèmeux over the macadamia cream to fill the remaining half of each tartlet.
7. Refrigerate the tartlets until you are ready to finish them.
Peach Insert
1. Mix the sugar and pectin NH.
2. Gently heat the peach purée.
3. Add the sugar and pectin NH, stir. Boil for 1-2 minutes.
4. Let cool slightly, then gently fold in the diced peaches.
5. Spoon around 30g into an insert form smaller than your dome form.
6. Freeze until solid.
Crème Bavaroise
To make the Crème Anglaise
1. Soak the gelatine powder in the water.
2. Warm the milk with the vanilla over medium heat until hot but not boiling. Turn power/gas off. Cover with cling wrap and let infuse for 15 minutes.
3. Whisk the egg yolks with sugar until smooth.
4.. Gently reheat the milk until hot but not boiling.
5. Gradually pour in a little hot milk while whisking constantly to prevent curdling.
6. Return the mixture to the saucepan. Cook over low heat, stirring constantly until it reaches 83°C or until it coats the back of a spoon.
7. Remove from heat and stir in the bloomed gelatine until fully dissolved.
8. Allow the custard to cool to room temperature, stirring occasionally.
To make the Crème Bavaroise
1. Whip the whipping cream to soft peaks.
2. Gently fold in the softly whipped cream until smooth and homogeneous. Keep the bavaroise slightly soft so it can be piped.
3. Fill into a pastry bag and fill six domes until they are half full.
4. Place a frozen peach insert in each dome, slightly press down.
5. Fill with remaining cream until the top.
6. Smoothen the top with a palette knife and freeze for at least 6 hours.
Neutral Glaze
1. Mix gelatine powder and water.
2. In a small saucepan, combine water, sugar, and glucose syrup. Heat gently until the sugar is dissolved and the mixture reaches a light simmer.
3. Remove from heat and add the lemon juice.
4. Then, stir in the bloomed gelatine until fully dissolved.
5. Let the glaze cool to about 30–35 °C (warm, but not hot) before pouring over the frozen domes.
Glaze the domes
1. Place domes on a wire rack over a tray to catch excess glaze.
2. Pour the glaze evenly over the top, letting it drip down the sides.
The fun part!
1. Place on dome on top of each tartlet.
2. Dust with vanilla powder.
3. Add a couple of peach slices for decoration.
- Category: Dessert / French Pâtisserie / Cake
- Method: assembling, Baking, layering, stovetop cooking
- Cuisine: French
How I Made a Gluten-Free Fraisier Cake on a Tiny Island
Welcome to Week 1: The Cake I Made
When I say this was a small miracle… I mean it.
I’ve been craving a Fraisier for weeks, but getting fresh strawberries on this island isn’t exactly guaranteed.
And then suddenly, there they were — local strawberries for sale.
I think that was the only sign I needed. I knew instantly that I had to get them and bake with them. And that it had to be a Fraisier.
Despite not having done it for a while, making the actual cake felt easy.
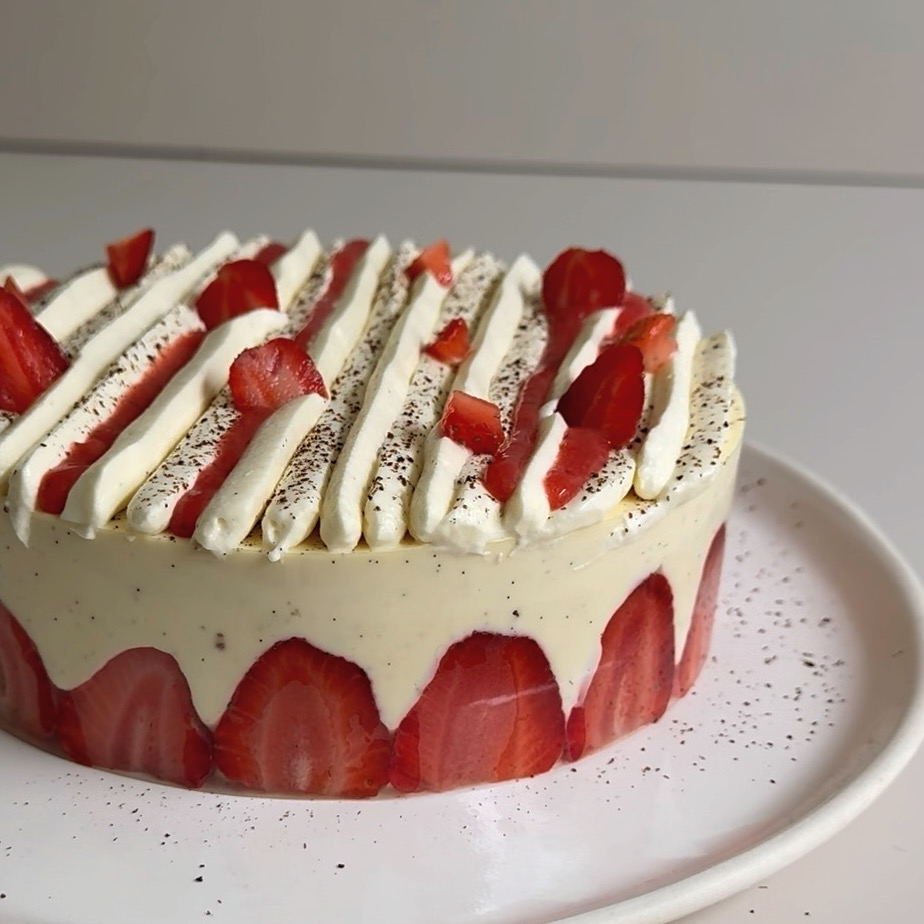
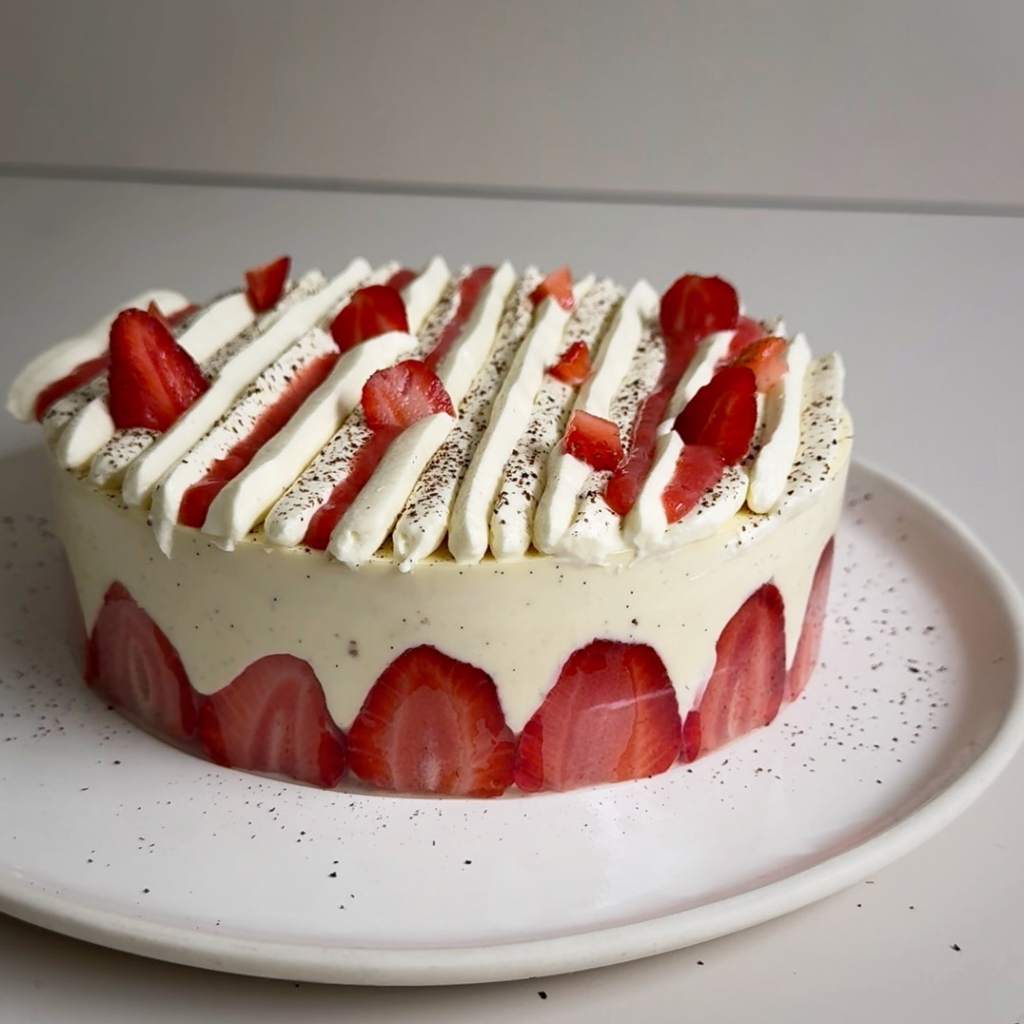
The piping on top… not so much (more on that later…).
And this cake mattered to me especially because I made it for the first people to come over and visit me: my dad and his wife.
To me, this cake is so incredibly elegant and yet it convinces with its simplicity: just a sponge cake, fresh strawberries and pastry cream turned into a diplomat cream.
I hope you’ll enjoy my gluten-free Fraisier cake recipe!
Why this cake means so much to me
The Fraisier is such a classic.
But for a long time I was afraid of trying to do one myself because it looks so complicated.
It wasn’t until pastry school in France that I made one myself.
And what can I say, I fell in love with it. My favourite part is probably the moment you lift the cake ring and you see the stunning outside of the cake for the first time.
And I absolutely loved that I got to make this one for my dad. I’m so happy I could finally show him and his wife what my life here looks like.
And you might not believe me, but it’s not that hard to do.
Follow the assembly steps as outlined below and trust me, you’ll be fine.
My tips for a perfect Fraisier
How to Get That Clean Strawberry Edge
- Put acetate the height of your cake ring inside the ring before starting.
- Try and choose similar sized strawberries for the outer, visible layer. Alternatively, trim your strawberries so they’re all the same height.
Use bigger/smaller strawberries for inside the cake or the top. - Fill the gaps in between the strawberries really well. Yes, use a piping bag for that. And yes, use a palette knife to gently press the cream around the fruits.
How to Keep Diplomat Cream Stable
Diplomat cream consists of pastry cream and whipped cream. When making it, keep the following things in mind:
- Cook your pastry cream well. I know it is tempting to finish cooking once it thickens, but continue for an additional 2-3 minutes.
- Add the gelatine once the cooking process is done as otherwise it will loose its gelatinising properties and your cream won’t hold.
- When making your diplomat cream, be sure you give your pastry cream a good stir. It should be smooth and lump-free but not runny.
Then, fold the whipped cream in gently. Important: Assemble the cake immediately or otherwise the cream will start to thicken and things get messy.
Decorating the Top
There are endless ways of decorating a Fraisier (see inspo below). If you want to pipe, consider the following:
- Fill your pastry bag with your preferred nozzle
- Pipe with even pressure, a steady hand, and don’t overthink it. Nobody is as critical as you are and people will love it anyway.
- Practice makes perfect! Trial your piping on a cake ring that’s been wrapped in cling wrap.
Make the Fraisier your own
The most fun part about making your own cake is that you also get to decorate it the way you want to.
Possibilities are endless, and from time to time I like to try something new.
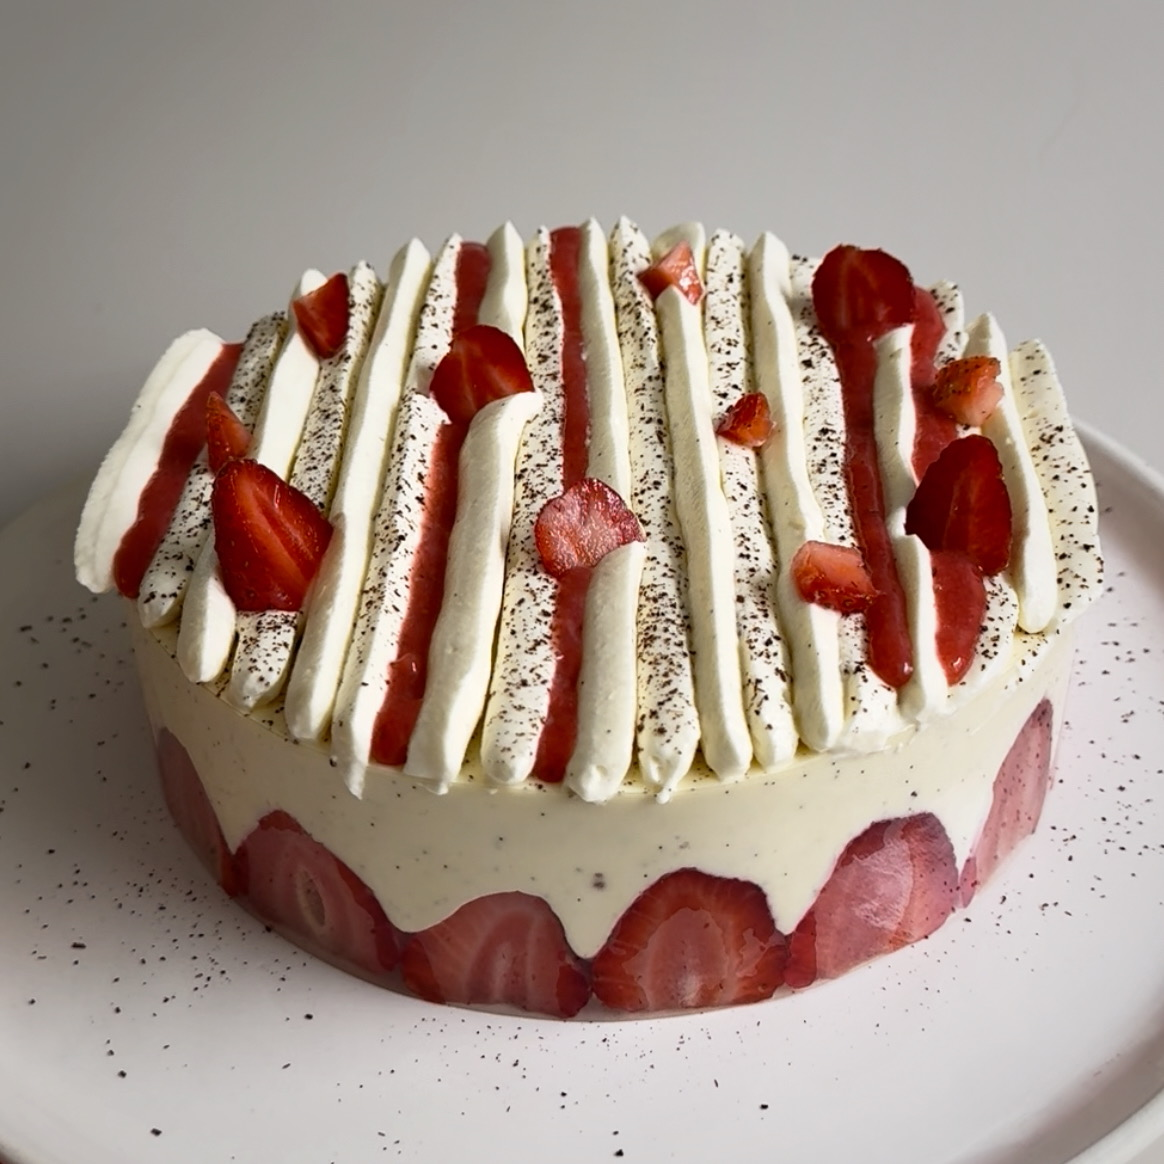
This time, this meant trialling a kind of piping that I have never tried before.
Straight lines. A lot of them.
I am not going to lie, I was dreading this moment.
But I also knew that I had to try it. If I didn’t try it in that moment, I might delay it for another year or two.
Opting for an option I am more comfortable with usually doesn’t give me the growth I’m looking for.
And sure, it can be better. But I’m glad I did it.
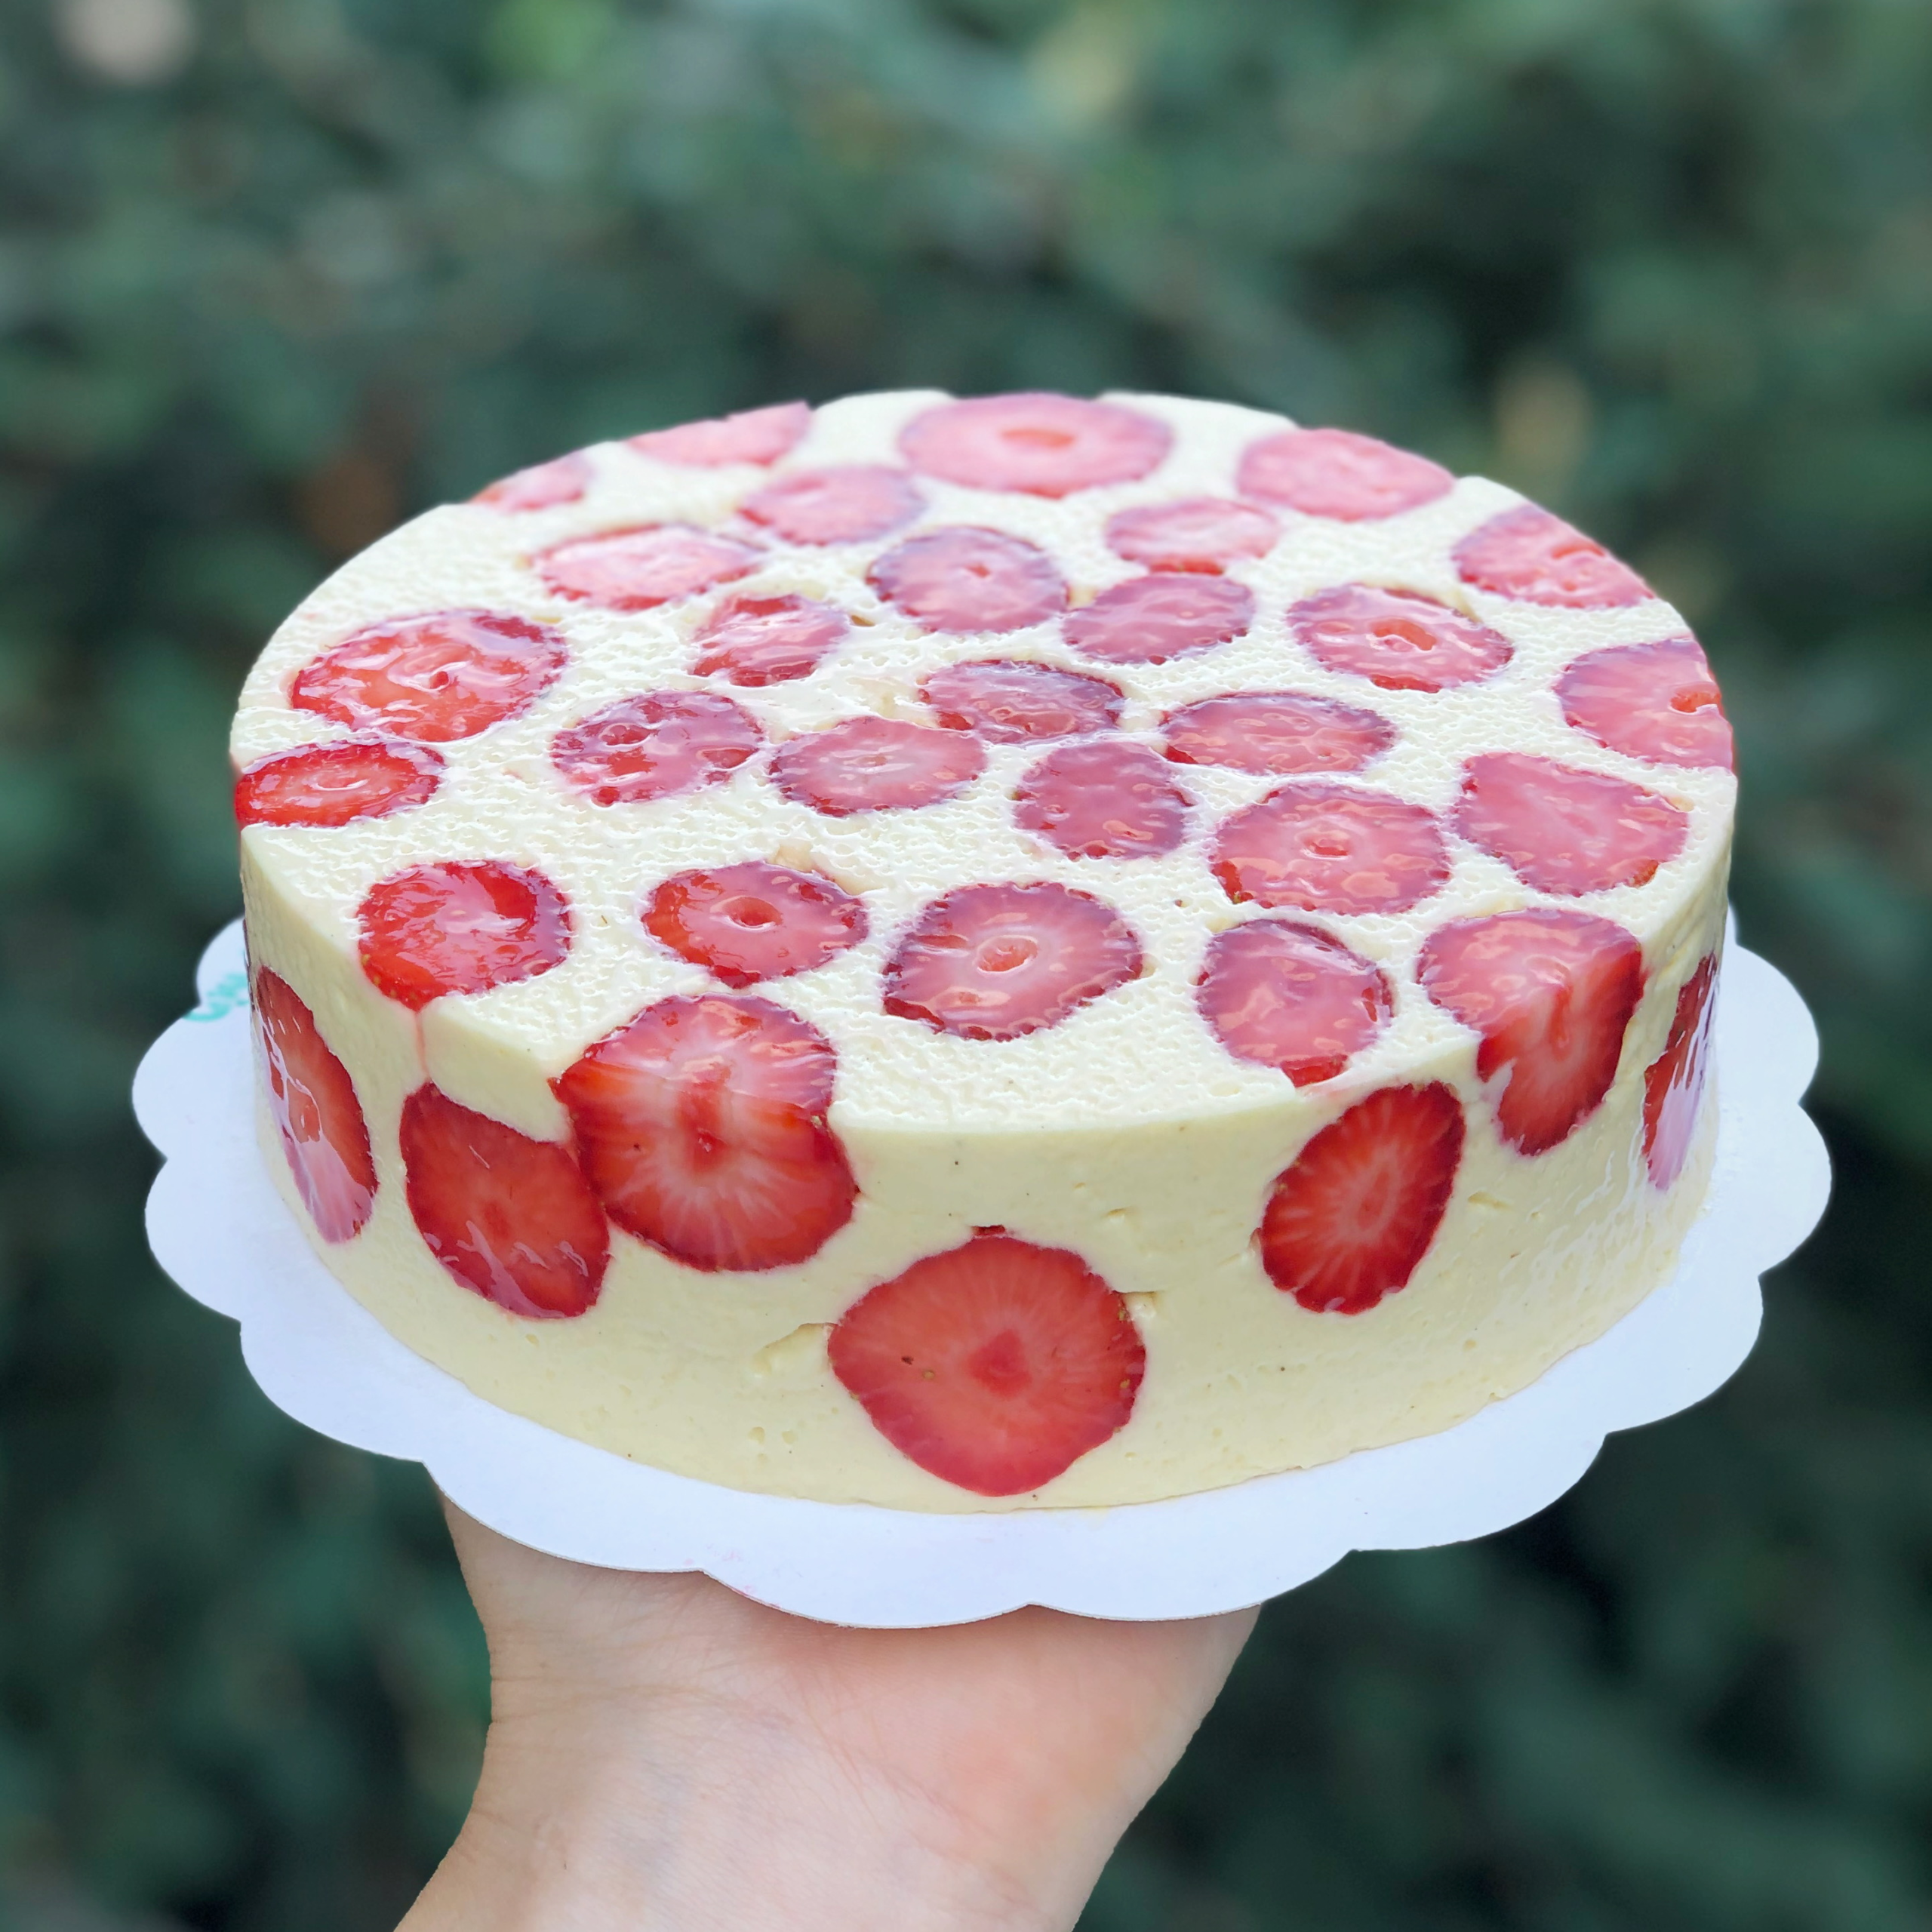
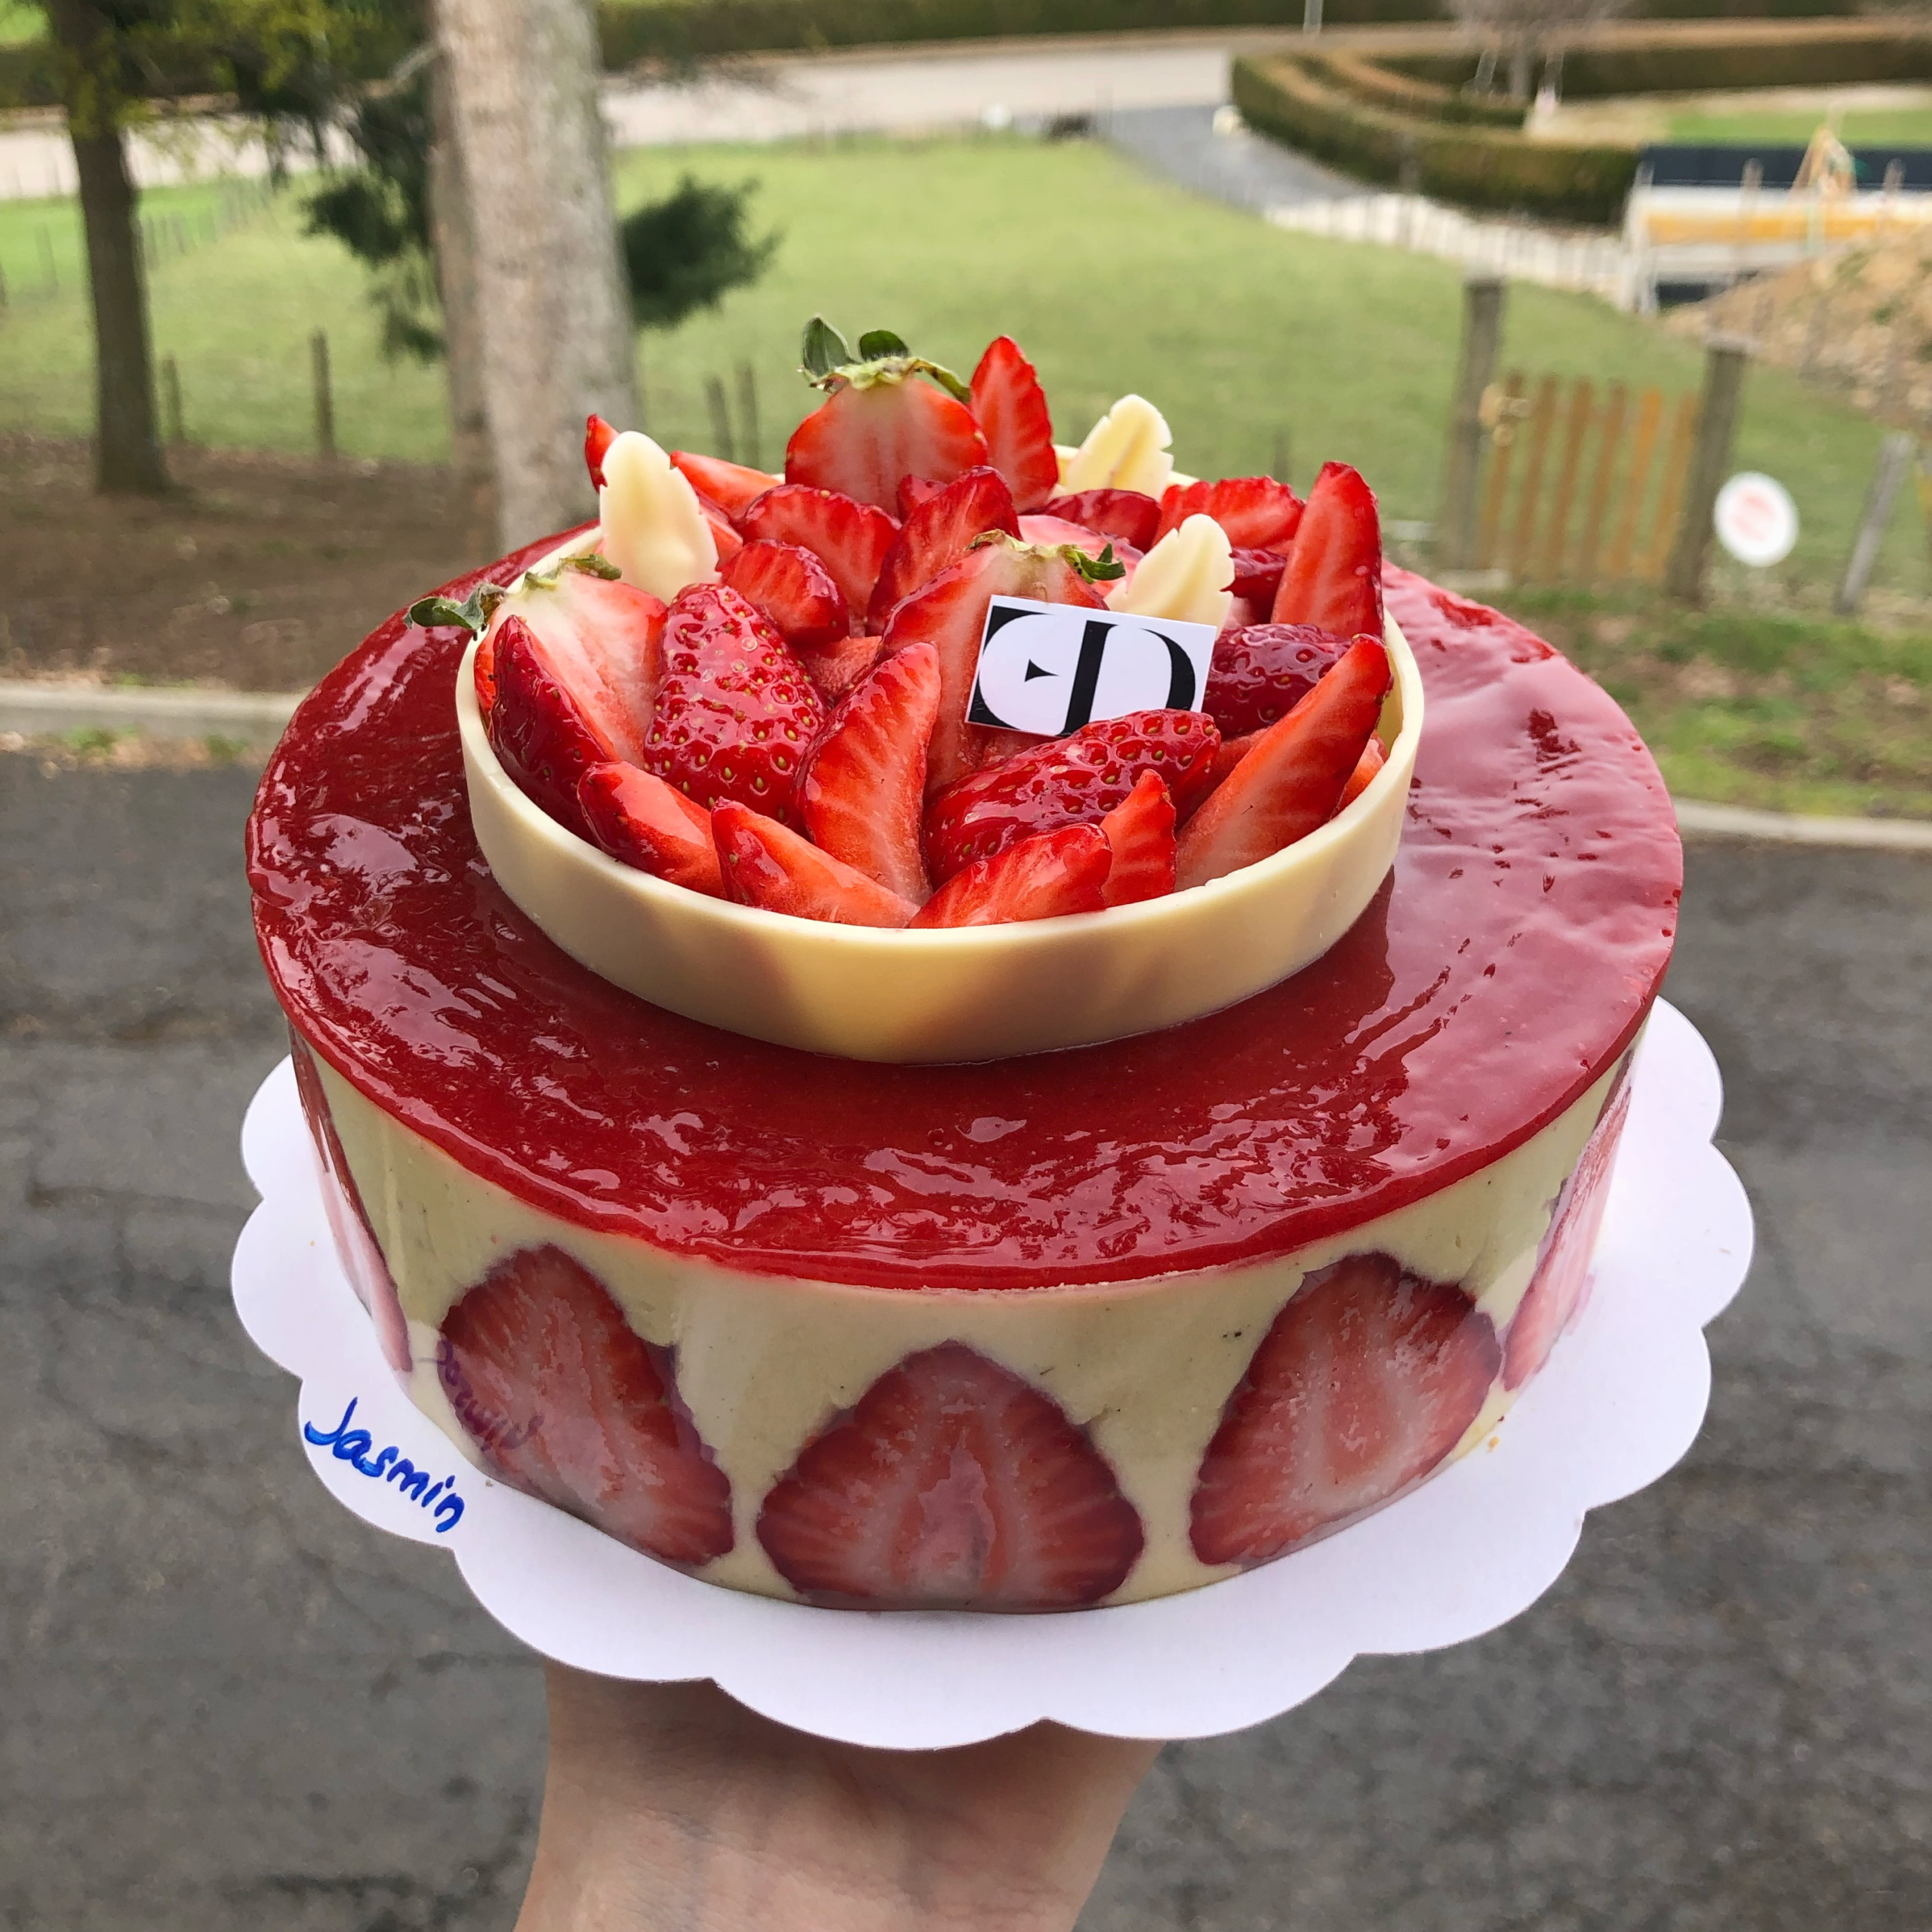
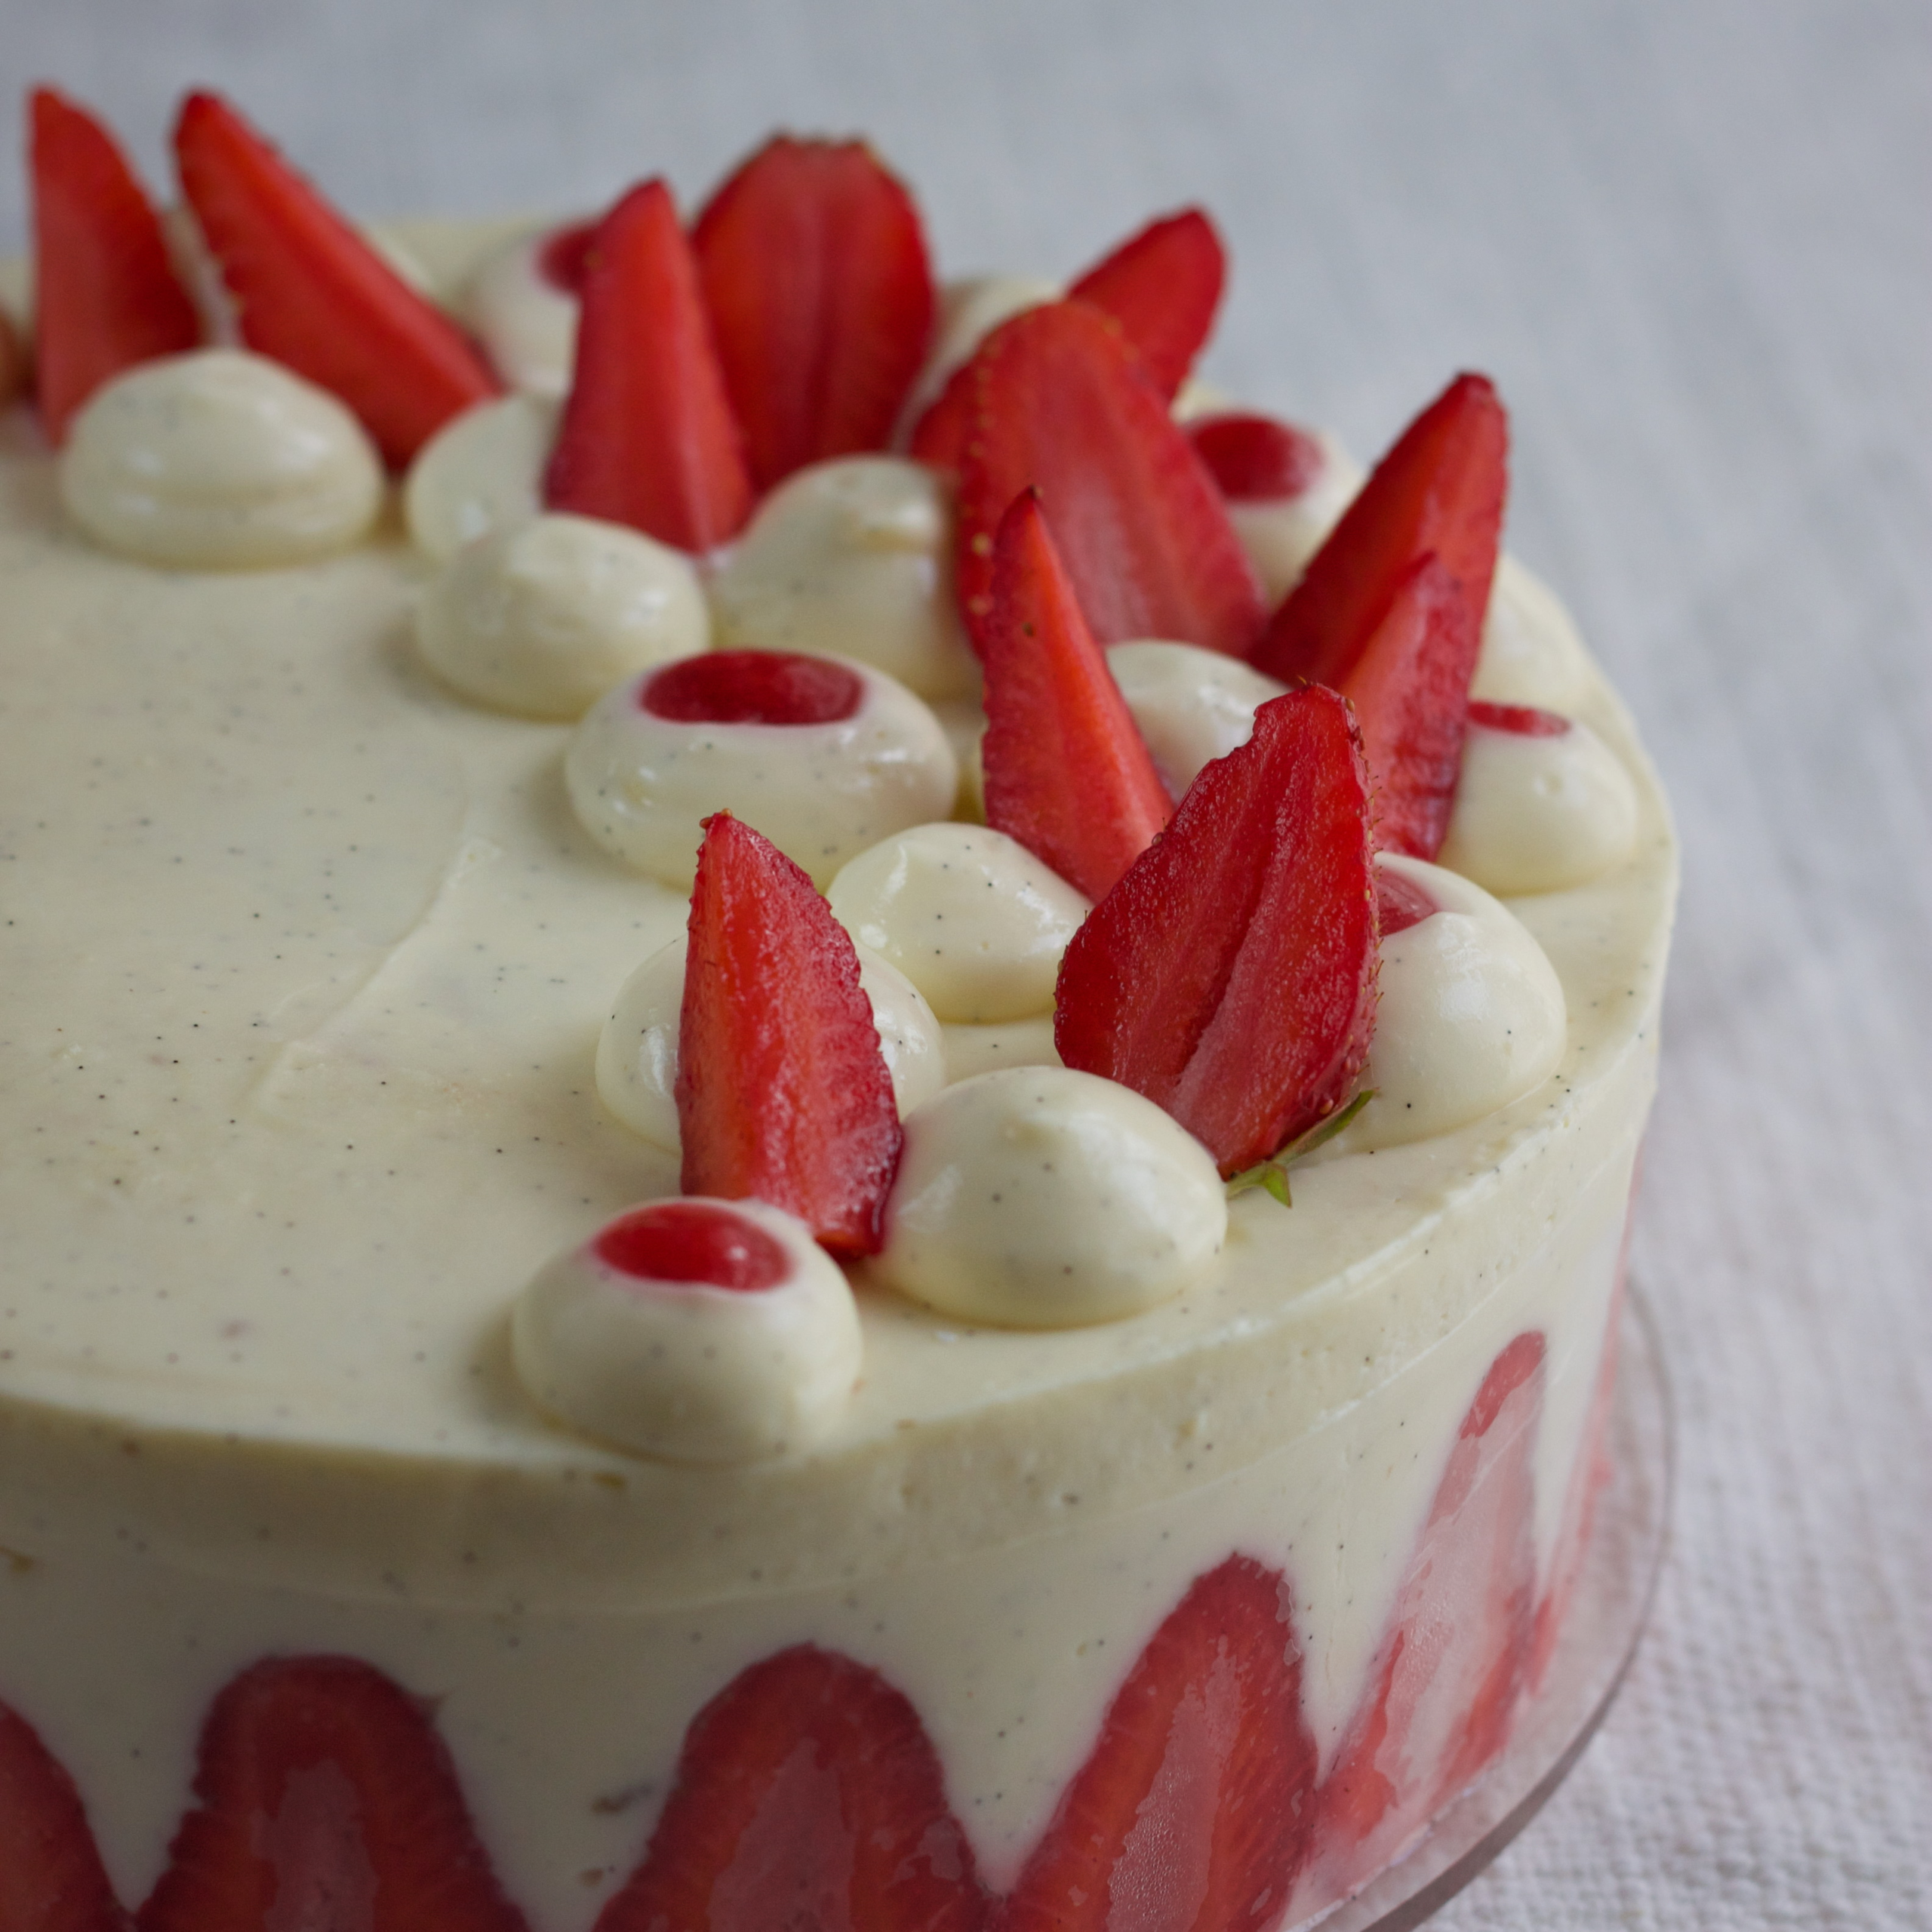
If you are looking into making this Fraisier your very own, have a look at the images below. Those are all different Fraisier versions I made in the past that have the same base. And you can use the same recipe below.
Have fun and feel free to reach out if any questions pop up!


Fraisier
- Author: Jasmin
- Total Time: 1 hour 40 minutes
- Yield: 1 Fraisier cake (16 cm), serves 6–8 1x
- Diet: Gluten Free
Description
My favourite Fraisier recipe and an absolute must-do for strawberry season! Plus, it’s gluten-free.
Ingredients
- 2 eggs
- 60g castor sugar
- 60 corn starch
- 150 g semi-skimmed milk
- 1/2 vanilla pod
- 50 g egg yolks
- 55 g caster sugar
- 20 g corn starch
- 6 g powdered gelatine
- 30 g water (to hydrate gelatine)
- 150 g cold whipping cream 35%
- 150g cold whipping cream 35%
- 50g strawberry confit
Instructions
Génoise
- Whip sugar and eggs to a ribbon consistency (roughly 7-10 minutes)
- Gently fold in the sifted corn starch.
- Spread into a 16 cm ring.
- Bake 25 minutes at 160°C.
Vanilla Diplomat Cream
Start by making the pastry cream:
- Heat the milk with vanilla and emptied vanilla pod.
- Turn off power/gas, cover with cling film and let infuse for 15 minutes.
- Whisk the yolks with sugar, then add the cornflour.
- Remove cling film from milk and take out vanilla bean.
- Add part of the hot milk to egg yolk and sugar mix to temper, whisk, then return everything to the pot.
- Cook until thickened and the mixture releases from the sides of the pot (2-3 minutes after boiling).
- Remove from heat, add melted gelatine, mix well.
- Spread on cling film and cool rapidly in fridge.
From pastry cream to diplomat cream:
- Whip the 150g of cold whipping cream to a soft texture and keep in fridge until used.
- Take the pastry cream out of the fridge and mix until smooth.
- Then, fold the whipped cream into it in 3 additions.
- Assemble the cake immediately.
Assembly and Finish
- Cut the génoise into two 14 cm discs, each 1.5 cm thick.
- Line the inside of a 16 cm ring with a 3cm acetate cake collar.
- Then, line the ring with halved strawberries. The cut half points to the outside.
- Using a piping bag with a 10 mm plain tip, pipe some cream in between the strawberries.
- Close all gaps between the strawberries with a palette knife.
- Place one génoise disc at the bottom.
- On top, pipe a spiral of diplomat cream.
- Add diced strawberries, cover with more diplomat cream.
- Add the second génoise disc, then finish with a thin layer of diplomat cream.
- Refrigerate thoroughly.
- Whip the 150g of cold whipping cream and sugar to stiff peaks.
The fun part!
- Pipe any decorations you want on top of your cake.
- Add the strawberry confit as you please.
- Decorate with fresh strawberries.
Notes
Honestly, I know this cake looks incredibly fancy but it is surprisingly easy to do!
Give it a try and if you have any questions at all, feel free to reach out here.
- Prep Time: 75
- Cook Time: 25
- Category: Dessert / French Pâtisserie / Cake
- Method: assembling, Baking, layering, stovetop cooking
- Cuisine: French